multi-sided box/bucket

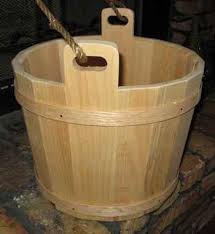
In the last post we looked at creating a four sided box that could be used as a bucket or planter box. The idea is to build a wooden cask or barrel by eventually increasing the number of sides or staves required to help the cask stay together and hold water without using glue. We build two versions. The first has straight sides and creates a 4x4x4 cube. The second is a little more complex and creates the same cube but reduces the bottom of the cube to 3 inches.

4_4_wood_planter 4_3_wood_planter

What would it take to make a six sided box of the same design? If we go to our on-line angle calculator we see that we need to cut the angle at 30 degrees rather than 45 degrees. The big question becomes how wide each side or stave should be.

six_sided

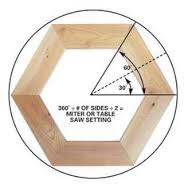
We want the entire piece to fit into a 4 inch square so we need to use geometry to calculate the length of each board. Two things that we know from the design are that three of these sides need to fit into four inches. This gives us The total width of the three sides combined. We also know that the total height of the three sides combined needs to fit into two inches. From this we can calculate the length of each board.

IMG_1306

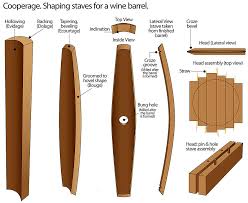
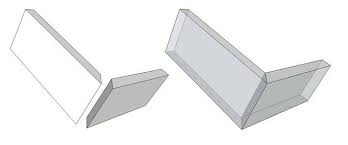
There are a few things to note. First the middle piece is parallel to the centerline. From this we can create a right triangle from the inside edge cut. We know that the thickness of the wood is 3/4 of an inch so we know one side of the triangle. We also know the angle of the resulting cut to be 60 degrees because we move the 30 degree part with the table saw. Using an online geometry assistant we can calculate the length of the wood remaining from the cut. If we draw a straight line at 90 degrees to the centerline we know the angle is 30 degrees and the height of the triangle is two inches. From this we know the angle and adjacent and want to calculate the hypotenuse.

adjacent-opposite-hypotenuse

We can calculate the Hypotenuse with one of the following equations:

SOH…
Sine: sin(θ) = Opposite / Hypotenuse
…CAH…
Cosine: cos(θ) = Adjacent / Hypotenuse
…TOA
Tangent: tan(θ) = Opposite / Adjacent

H = A / cos(angle). We know that A is 2 inches and the angle is 30 degrees. It is important to realize that Excel uses radians so the outer length of the wood (hypotenuse) = A / cos (angle / 180 * pi()) = 2 / cos(30/180*pi()) = 2.3094. This is perfect because we can use this to cut the width of our board. We need to cut it 4 inches high with a 90 degree cut. We then reset the table saw blade to 30 degrees and cut one edge then set the blade guide to make the second cut 2.31 inches wide. The outer edge to outer edge will be 2.31 inches long. The inner edge will be (2 – 3/4) / cos(30/180*pi()) or 1.443 inches.

six_sided_box

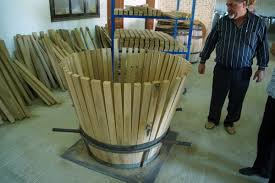
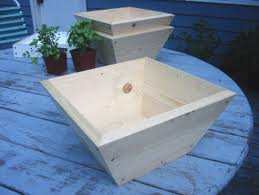
The next exercise is to build the tapered bucket where the top is four inches and the bottom is three inches.

six_sided_tapered_box

The angle that we used for the four sided box translates here as well. The top of the box ends up being 2.31 inches. The bottom of the box can be calculated by using the 1.5 inch centerline with a 3/4 inch thick wood at a 30 degree angle. This calculates out the width of the bottom of the taper to be 1.732 inches. Using the on-line calculator the blade tilt should be 29.7 degrees. This results in a cut of six pieces that should fit together.

IMG_1308 IMG_1307

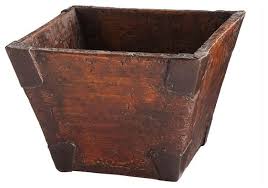
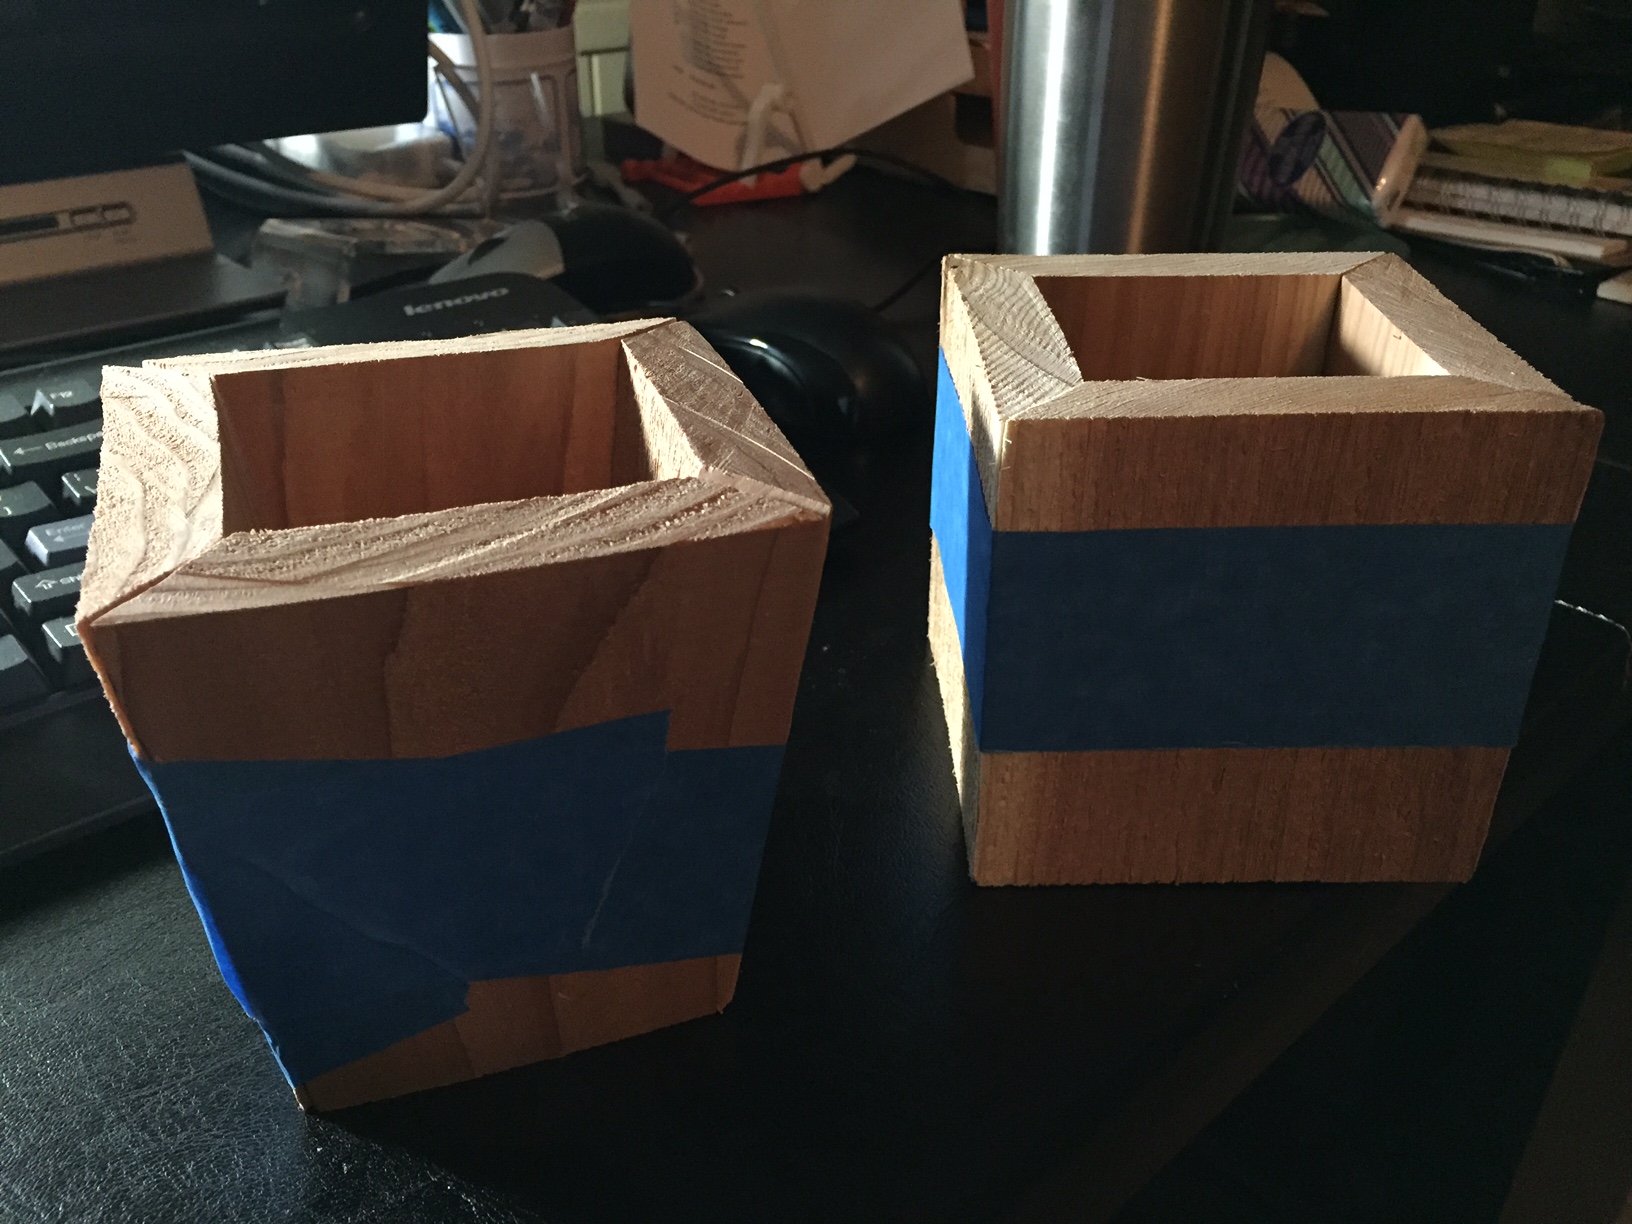
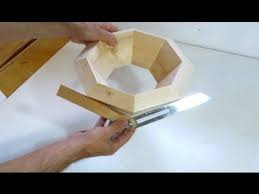
The resulting physical boxes look like

IMG_1309

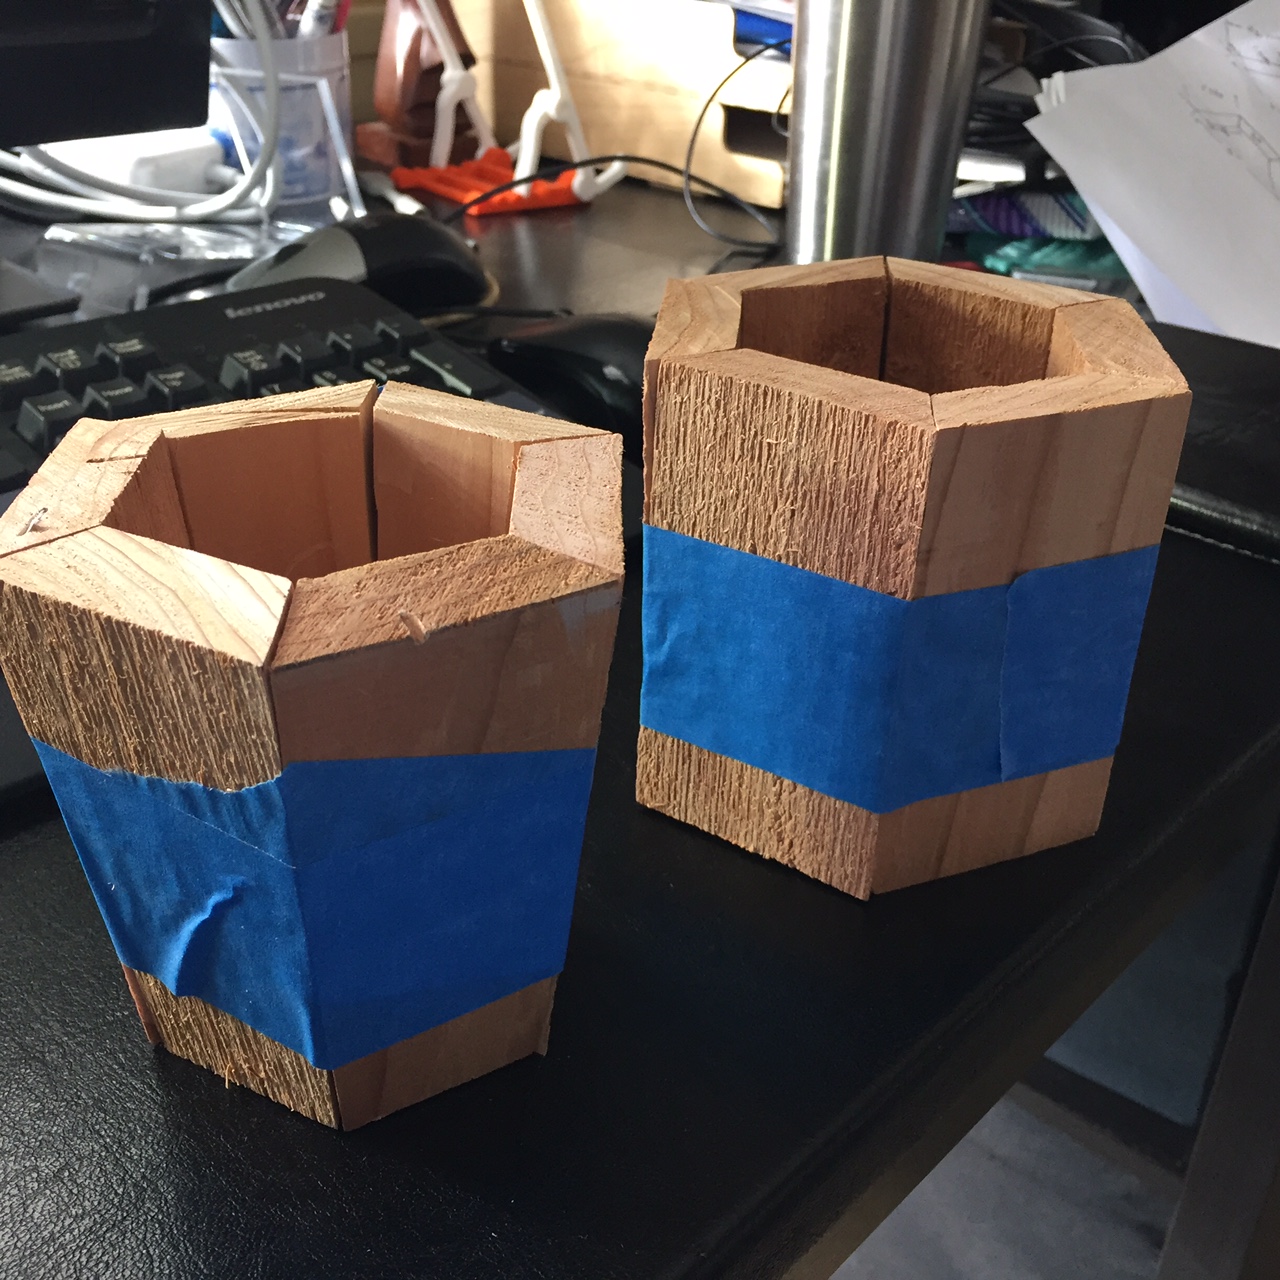
Note that we use blue painters tape to hold the pieces together. We are close to being a round so a metal band might or might not hold the box together. We are getting close. Next up, an eight sided box is the next project. We might need to increase the size of the box because the width of each board is getting a little small when you try to cut it with a table saw. We will probably try to fit this into a 8 inch square because it basically just doubles all of the measurements.

real math – real wood

Something that peaked my interest during the holiday break was Bourbon and Whiskey. I was driving back from Austin one day and saw a sign for Bone Spirits Distillery in Smithville, Tx. I stopped and was interested in a local distiller using local corn to produce whiskey, gin, and bourbon. I talked to the owner and he explained how everything is local with the exception of the Rye because you can’t get good sweet rye grass in Texas. The conversation spurred a thought in my head. If we are starting to get local distillers who are producing white whiskey there might be a need for building or buying an aging cask to blend my own bourbon.

There appear to be a bunch of casks available through Amazon or others (Barrels Online, The Barrel Mill, and Deep South Barrels [Pearland, Tx]) for $50-$150 depending upon the size (1 liter – 20 liter). The idea is that you purchase an oak cask that has been charred on the inside and you fill it with the blend that you want. The char of the oak adds flavor and color to the white whiskey to create a blend that you want. front

The idea of creating my own blend appealed to me so I ordered a 1 liter cask. The jury is out on how well it will work. The idea appealed to me so much that I wanted to figure out what it would take to create a cask/keg on my own. I started studying the woodworking details and skills needed to build an aging barrel or smaller cask. It turns out that this is a century (literally century) old process. The early woodworkers were called coopers because they hand cut the wood with hand tools to create barrels. I wanted to see how difficult it would be to build a barrel using modern tools like a table saw, band saw, welder, and other tools.

My initial research shows that a barrel consists of a number of boards that are shaped narrow at one end, fat in the middle, and narrow at the other end. A metal band is placed around the narrow end to pull the wood together and help make it water tight. The construction does not require glue or any adhesive, just wood, moisture, and metal bands to keep everything together. These boards (called staves) have a very predefined configuration so that the fat ends fit together and allow the barrel to roll easily since they are relatively large and heavy. The narrow ends pinch together with a metal band and are pushed out with a circular board that act as the ends of the barrel. The cuts seem relatively simple. download (1) download

I wanted to figure out how complex the cuts were so I started with something a little simpler. Given that a barrel or cask is wide in the middle and symmetric getting smaller at both ends I should be able to build half of this and test fitting everything together before doing a full barrel. Surprisingly this is the design of a wooden bucket or wooden planter. There are plenty of samples and references for wooden buckets.

4_side_bucket oak_bucket

I wanted to start with something simple and work my way up. The easiest was to build a four sided “planter box” that was 4 inches wide at the top and 4 inches wide at the bottom. This would create a simple 4 inch by 4 inch by 4 inch box. I used cedar to create this since it is inexpensive wood and could be used as a planter box. The cuts were simple. The first cut is to get a piece of wood that is wider than four inches and cut four of them to four inches in length. The cut is a 90 degree cut to create the height of the bucket. The next two cuts are done at 45 degrees to create the sides. The first cut creates the reference width. The second cut is done so that the longest edge of the cut is four inches long. The resulting board is four inches tall with flat cuts on each end. The sides are cut at 45 degrees to allow you to fit each side together to form a box. 45_degree_cut

The resulting box looks very simple but does require glue to keep it together. A band around the box will keep the bottom in but will not hold water at the top because it is difficult to get pressure on the joints with a square band across the top and bottom. 4_4_wood_planter

A more challenging cut is to do a tapered box with a 4 inch top and 3 inch bottom. The design is a little more elegant and visually appealing. Again, this design requires glue to fit together but does allow us to practice angle cuts and take the next step in creating more staves or sides to round the bucket more. 4_3_wood_planter

The math behind this construction is a little more complex but not that much more. If we look at each piece of wood we will first cut four 4 inch pieces of wood to get the 4 inch height. We then draw a line from the top corner to half inches inside to get a three inch bottom. You can calculate the cuts required using geometry or cheat and use an online cutting guide. We do have to use a little math to use the online guide. It asks for the number of sides and angle. To get the angle we need to figure out what a 4 inch top and 3 inch bottom angle generates. We can do this because we know the adjacent height (4 inches) and opposite width (1/2 inches) of the triangle that we are trying to create. From this we can calculate the angle as tan(angle) = opposite / adjacent. This correlates to angle = arctan(0.5/4). In Excel this would be =atan(0.5/4) which yields 0.12435. Unfortunately this returns a value in radians which means nothing on a table saw. We need to multiply this by 180 and divide by pi. In Excel this would be = atan(0.5/4)*180/pi(). This yields 7.125 degrees. Note that changing the height of the bucket will change the angle. If we plug in 4 sides and 7.125 degrees into the jansson.us N-sided box calculator we get a blade tilt of 44.6 degrees. This is difficult to measure but if we set the blade tilt to a notch short of 45 degrees it should work.

The two resulting boxes came out well using cedar. I am using blue painters tape to hold the sides together. The intent of this prototype is to get a basic shape and make sure when we go to more sided boxes we fit within the same space. Our next test will be a six sided box of the same dimensions.

IMG_1304