AWS networking with Terraform

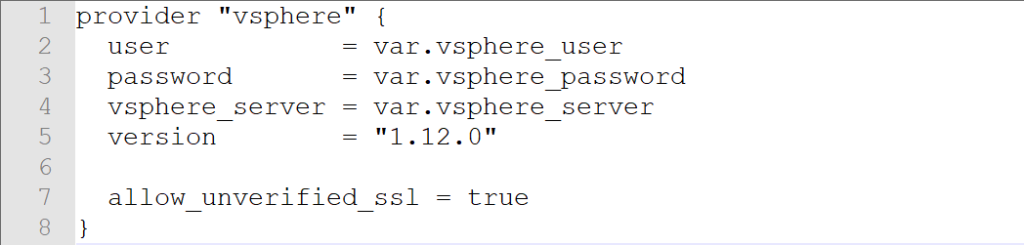
In our previous blog we talked about provisioning an AWS Provider into Terraform. It was important to note that it differed from the vSphere provider in that you can create multiple AWS providers for different regions and give an alias to each region or login credentials as desired. With vSphere you can only have one provider and no aliases.

Once we have a provider defined we need to create elements inside the provider. If our eventual goal is to create a database using software as a service or a virtual machine using infrastructure as a service then we need to create a network to communicate with these services. With AWS there are basically two layers of network that you can define and two components associated with these networks.

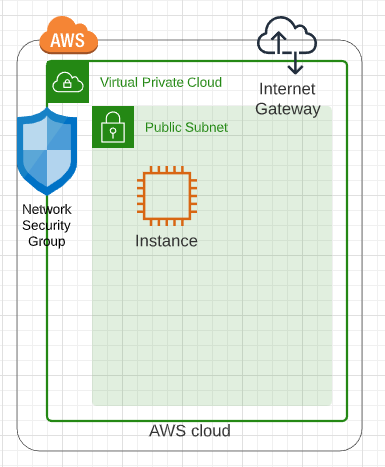
The first layer is the virtual private network which defines an address range and access rights into the network. The network can be completely closed and private. The network can be an extension of your existing datacenter through a virtual private network connection. The network can be an isolated network that has public access points allowing clients and consumers access to websites and services hosted in AWS.

Underneath the virtual private network is either a public or private subnet that segments the IP addresses into smaller chunks and allows for instances to be addressed on the subnet network. Multiple subnet definitions can be created inside a virtual private network to segment communications with the outside world and private communications between servers (for example a database server and applications server). The application server might need a public IP address and an private IP address while the database server typically will only have a private IP address.

Associated with the network and subnets are a network security group and internet gateway to restrict access to servers in the AWS cloud. A diagram of this configurations with a generic compute instance is shown below.

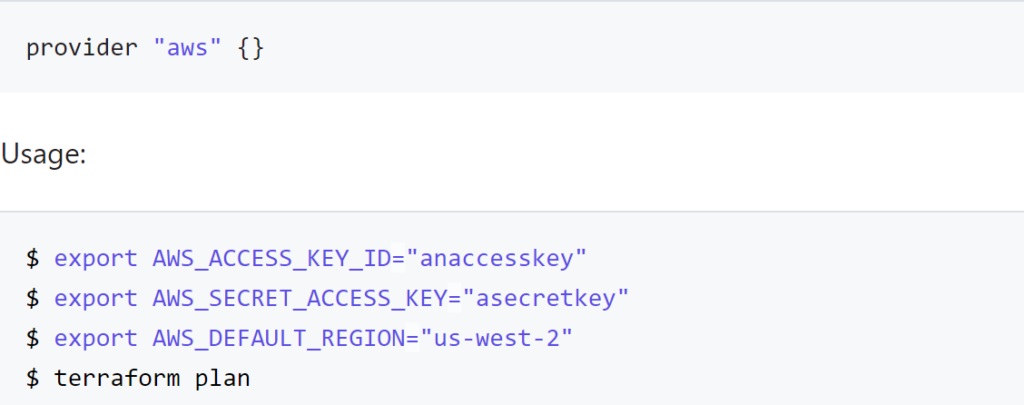
The first element that needs to be defined is the AWS Provider.

provider “aws” {
version = “> 2”
profile = “default”
region = “us-east-1”
alias = “east”
}

The second component would be the virtual private cloud or aws_vpc.

resource “aws_vpc” “myNet” {
cidr_block = “10.0.0.0/16”
provider = aws.east
tags = {
Name = “myNet”
environment = var.environment
createdby = var.createdby
}
}

Note that the only required attribute for the aws_vpc is the cidr_block. Everything else is optional. It is important to note that the aws_vpc can be defined as a resource or as a data element that does not create or destroy the network definition in AWS with terraform apply and destroy. With the data declaration the cidr_block is optional given that it has already been defined and the only only attribute needed to match the existing VPC is the name or the ID of the existing VPC.

Once the VPC has been created an aws_subnet can be defined and the two required elements for a resource definition are the cidr_block and the vpc_id. If you want to define the aws_subnet as a data element the only required resource is the vpc_id.

resource “aws_subnet” “MySubnet” {
provider = aws.east
vpc_id = aws_vpc.myNet.id
cidr_block = “10.0.1.0/24”
tags = {
Name = “MySubnet”
environment = var.environment
createdby = var.createdby
}
}

The provider declaration is not required but does help with debugging and troubleshooting at a later date. It is important to note that the VPC was defined with a /16 cidr_block and the subnet was a more restrictive /24 cidr_block. If we were going to place a database in a private network we would create another subnet definition and use a different cidr_block to isolate the network.

Another element that needs to be defined is an aws_internet_gateway to define access from one network (public or private) to another network. The only required element that is needed for the resource declaration is the internet gateway id. If you define the aws_internet_gateway as a data declaration then the name or the vpc_id is required to map to an existing gateway declaration.

resource “aws_internet_gateway” “igw” {
provider = aws.aws
vpc_id = aws_vpc.myNet.id
tags = {
Name = “igw”
environment = var.environment
createdby = var.createdby
}
}

The final element that we want to define is the network security group which defines ports that are open inbound and outbound. In the following example we define inbound rules for ports 80, 443, and 8400-8403, ssh (port 22), and rdp (port 3389) as well as outbound traffic for all ports.

resource “aws_security_group” “cmvltRules” {
provider = aws.aws
name = “cmvltRules”
description = “allow ports 80, 443, 8400-8403 inbound traffic”
vpc_id = aws_vpc.myNet.id

ingress {
description = “Allow 443 from anywhere”
from_port = 443
to_port = 443
protocol = “tcp”
cidr_blocks = [“0.0.0.0/0”]
}

ingress {
description = “Allow 80 from anywhere”
from_port = 80
to_port = 80
protocol = “tcp”
cidr_blocks = [“0.0.0.0/0”]
}

ingress {
description = “Allow 8400-8403 from anywhere”
from_port = 8400
to_port = 8403
protocol = “tcp”
cidr_blocks = [“0.0.0.0/0”]
}

ingress {
description = “Allow ssh from anywhere”
from_port = 22
to_port = 22
protocol = “tcp”
cidr_blocks = [“0.0.0.0/0”]
}

ingress {
description = “Allow rdp from anywhere”
from_port = 3389
to_port = 3389
protocol = “tcp”
cidr_blocks = [“0.0.0.0/0”]
}

egress {
description = “Allow all to anywhere”
from_port = 0
to_port = 0
protocol = “-1”
cidr_blocks = [“0.0.0.0/0”]
}

tags = {
Name = “cmvltRules”
environment = var.environment
createdby = var.createdby
}

}

For the security group the protocol and from_port are the only required definitions when defining an aws_security_group resource. If you declare an aws_security_group data declaration then the name is the only required element. For the declaration shown above the provider and vpc_id to help identify the network that the roles are associated with for debugging and troubleshooting.

This simple video looks at the AWS console to see the changes defined by terraform using the main.tf and network.tf files saved in github.com.

In summary, network definitions on AWS are radically different and more secure than a typical vSphere provider definition with undefined network configurations. Understanding network configurations in Terraform help build a more predictable and secure deployment in the cloud. If you are part of a larger organization you might need to use data declarations rather than resource declarations unless you are creating your own sandbox. You might need to join a corporate VPC or dedicated subnet assigned to your team. Once networking is defined, new and creating things like moving dev/test to the cloud or testing database as a service to reduce license costs. The only step missing from these configuration files are setting up the aws configure and authentication using the AWS CLI interface. Terraform does a good job leveraging the command line authentication so that the public and private keys don’t need to be stored in files or configuration templates.

Terraform variables vs data

In our last blog post we looked at data vs resources with Terraform and talked about static vs dynamic characteristics of data when compared to resources. In this blog we are going to look at using variables to declare structures rather than using data declarations. We will also cover a third option to use Local Values rather than variables and where they might be useful. It is important to note that there is no right or wrong answer with the use of local, variables, or data since they effectively perform the same functions and do not destroy structures as resources do when you execute the destroy option with terraform.

First, let’s look at Local Values. Declaring a local value allows you to insert a relatively static label into a variable stream. They are typically used for structures like tags or common_tags rather than static constructs. It is an easy way to declare something like a version or group that manages and maintains the resource in question.

locals {
  service_name = "forum"
  owner        = "Community Team"
}
locals {
  # Common tags to be assigned to all resources
  common_tags = {
    Service = local.service_name
    Owner   = local.owner
  }
}
resource "aws_instance" "example" {
  # ...

  tags = local.common_tags
}

Note that the initial declaration is a name associated with a string. The second declaration aggregates references to these tags into another tag with the local.<name> reference. This name can then be accessed with the local.common_tags reference in main code and not have to replicate the service or owner tag information. Unfortunately, defining associations in a locals declaration does not allow for values to be passed in from the command line as is done with variables.

Input Variables allow you to define a string relationship similar to locals but also allows you to pass in values from other files or the command line. Input variables serve as parameters for a module and allow for customization and differentiation between two environments. For vSphere, for example, given that you can not have two vSphere providers or datacenters in the same code defining a datacenter for development and one for production can be done with variables and reference a common code base in another directory.

variable "image_id" {
  type = string
}

variable "availability_zone_names" {
  type    = list(string)
  default = ["us-west-1a"]
}

variable "docker_ports" {
  type = list(object({
    internal = number
    external = number
    protocol = string
  }))
  default = [
    {
      internal = 8300
      external = 8300
      protocol = "tcp"
    }
  ]
}

A variable definition has an identifier associated with it and typically a type that can be a string, number, or boolean and can be combined for more complex relationships like lists, sets, objects, or touples. Variables are typically defined in a file called .tfvars rather than a .tf file or can be passed in with the -var=”label=value” command line parameter. Alternately, variables can be defined as environment variables from the command line and the terraform command line understands how to read these values. Typically user credentials like username and password or public and private keys are defined in an environment variable rather than in a file. For a vSphere provider you can define the following environment variables and hide the connection detains to a server

  • VSPHERE_USER (var.user)
  • VSPHERE_PASSWORD (var.password)
  • VSPHERE_SERVER (var.vsphere_server)
  • VSPHERE_ALLOW_UNVERIFIED_SSL (var.allow_unverified_ssl)

Defining any of these variables on the command line get passed into the terraform control files without having to define them in a .tf or .tfvars file or having to pass them in with the -var command line extension. The var.<name> extension shown above are the constructs used to reference each of the parameters in the terraform control files. The three parameters required for a connection to a vSphere server are the var.user, var.password, and var.vsphere_server with the var.allow_unverified_ssl as an optional parameter.

provider "vsphere" {
  user           = var.vsphere_user
  password       = var.vsphere_password
  vsphere_server = var.vsphere_server

  # If you have a self-signed cert
  allow_unverified_ssl = true
}

Typically this is all the code that is needed to connect to a vSphere server. You could define the user, password, and vsphere_server as locals and reference them as local.user but that implies that one of your .tf or .tfvars files contains a password definition that becomes a security issue with file management and version control. Putting the user and password in an environment variable allows for dynamic changing of roles and credentials from the VMware side of the house without having to change your .tf or .tfvars files. Having the vspher_server defined with environment variables allows management of development, production, and disaster recovery using a common foundation file and not having to define a main.tf for each environment.

We could have just as easily defined our user, password and server with a Data Source definition rather than a variable definition. A data declaration is similar to a local declaration but can be more complex than a string comparison.

data "aws_ami" "example" {
  most_recent = true

  owners = ["self"]
  tags = {
    Name   = "app-server"
    Tested = "true"
  }
}

Declaring a username and password with a data definition is not the most secure and safe way of defining this data. Using a variable declaration and environment variable pulls this information out of source code control and security concerns. Defining a datastore or a template with a data declaration makes more sense given that structures like datacenter, datastore, folder structures, and templates hopefully do not change significantly over time. Templates might change based on new operating system releases but managing this change with a new declaration can be a good thing.

Hopefully, this post helps understand the key difference between variable and data declarations. Both have a purpose. Both can be used. There are some technical reasons to use one over the other. There are some security concerns where one might be a better selection. The real answer is to look at how your organization uses the different constructs and have a meaningful conversation on why one is used and why another is used instead. This is one of the grey areas where there is not one way of solving the problem.

Terraform Providers

One of the foundational components of automation is being able to speak in the language of your target. With AWS, for example, CloudFormation is a good tool to define what a deployment in AWS should look like and ensures conformity to the design definition. The main problem is that CloudFormation only works on AWS and does not work on other deployment platforms. Terraform, on the other hand, performs the same automation from a configuration definition and creates the desired components onto a variety of platforms. The mechanism used to perform this function is the inclusion of a provider definition. If you think in terms of Java or C programming a provider is a set of library functions that can be called and including a provider definition is similar to a include statement to pull in a library header.

Some good blogs that compare and contrast Terraform vs CloudFormation include:

If you look at the definition of a provider from HashiCorp on their Providers page it defines a provider as a way to expose the API interface of the backend system as well as tasks that might be needed like random number generation utilities to generate names. The Terraform Registry includes a list of providers and systems that Terraform can interface with. Checking the public cloud box provides us with a list of various cloud hosting targets that we will focus on in later blogs.

For the purpose of this blog we will dive into the VMware vSphere provider to get an understanding of how to call it, what happens when you call it, and what constructs are needed when you call it. In a previous blog we compared the vSphere provider to the AWS provider on a very high level to talk about the format differences between providers. In this blog we will dive deeper into the vSphere provider to help understand how to deploy it in a development, production, and disaster recovery scenario.

Selecting the vsphere provider and clicking on the USE PROVIDER button at the top right it shows that you can call the provider with either the required_providers or provider command structures. We will use the simplest example by calling only

provider “vsphere” { }

Looking at the documentation there are a variety of optional and required parameters that are needed inside the curly brackets.

The parameter options that we need for the provider definition include (taken straight from the hashicorp page):

  • user – (Required) This is the username for vSphere API operations. Can also be specified with the VSPHERE_USER environment variable.
  • password – (Required) This is the password for vSphere API operations. Can also be specified with the VSPHERE_PASSWORD environment variable.
  • vsphere_server – (Required) This is the vCenter server name for vSphere API operations. Can also be specified with the VSPHERE_SERVER environment variable.
  • allow_unverified_ssl – (Optional) Boolean that can be set to true to disable SSL certificate verification. This should be used with care as it could allow an attacker to intercept your auth token. If omitted, default value is false. Can also be specified with the VSPHERE_ALLOW_UNVERIFIED_SSL environment variable.
  • vim_keep_alive – (Optional) Keep alive interval in minutes for the VIM session. Standard session timeout in vSphere is 30 minutes. This defaults to 10 minutes to ensure that operations that take a longer than 30 minutes without API interaction do not result in a session timeout. Can also be specified with the VSPHERE_VIM_KEEP_ALIVE environment variable.

For security sake it is recommended to hide user and password information in a different file from the definition or have it as environment variables in the shell to pass into terraform. In this example we will create two files, variables.tf and main.tf to simple call the provider definition and look at the constructs that are created by terraform.

The main.tf file looks like

provider “vsphere” {
user = var.vsphere_user
password = var.vsphere_password
vsphere_server = var.vsphere_server
version = “1.12.0”

allow_unverified_ssl = true
}

Note the use of var.<something> to pull in the definition of an externally defined variable. This could be done with a second file or with environment variables. For a variables.tf file we could enter

variable “vsphere_user” {
type = string
default = “administrator@vsphere.local”
}

variable “vsphere_password” {
type = string
default = “NotTheRIghtPassword”
}

variable “vsphere_server” {
type = string
default = “10.0.0.72”
}

In the variables.tf file we define three string values and include a default value to pre-define what the variable should be defined as. If we open up a PowerShell windows (or Terminal on Linux) we can see that there are only the variables.tf and main.tf files in the directory.

Note that we are using PowerShell 7 as the command line interface so that we can test out the connection to our vSphere server using PowerCLI commands to verify variable definitions.

If we type

terraform init

The hashicorp/vsphere provider data is pulled from the web and placed in the .terraform subdirectory.

Looking at the .terraform directory it contains a grouping of libraries that we can call from our main.tf definition file.

If we use the tree command we can see the nested structure and note that there is a selections.json file at the plugins and a terraform-provider-vsphere_v1.12.0_x4.exe at the windows_amd64 subdirectory

What the init command did was find out what platform we are running on and pulled down the appropriate binary to translate terraform modules and resource calls into API calls into vSphere. For our example we will make API calls into our vSphere server located at 10.0.0.72 as administrator@vsphere.local with the given password. The selections.json file contains a hash value that is used to test the binary integrity of the terraform-provider-vsphere_v1.12.0_x4.exe and download a new version if needed next time the init command is issued.

At this point we can call the

terraform plan

command to test our main.tf and variables.tf configurations. Everything should work because the syntax is simple so far.

Note that we don’t have a state file defined yet. This should happen when we type

terraform apply

Once we execute this command we get a terraform.tfstate file locally that contains the state information of the current server. Given that we have not made any resource definitions, data declarations, or module calls we don’t have any need to connect to the server. The tfstate file generated is relatively simple.

{
“version”: 4,
“terraform_version”: “0.13.3”,
“serial”: 1,
“lineage”: “f35a4048-4cee-63e0-86b2-e699165efbe5”,
“outputs”: {},
“resources”: []
}

If we included something simple like a datacenter definition the connection will fail with the wrong password.

Putting in the right password but the wrong datacenter will return a different value

To get the right datacenter we can go to the vSphere html5 user interface or use the Connect-VIserver command to look for the datacenter name.

In this example we should use the Home-Datacenter as the Datacenter name.

It is important to note that the tfstate file changes with the successful apply and the resources section now contains valid data about our server.

{
“version”: 4,
“terraform_version”: “0.13.3”,
“serial”: 2,
“lineage”: “f35a4048-4cee-63e0-86b2-e699165efbe5”,
“outputs”: {},
“resources”: [
{
“mode”: “data”,
“type”: “vsphere_datacenter”,
“name”: “dc”,
“provider”: “provider[\”registry.terraform.io/hashicorp/vsphere\”]”,
“instances”: [
{
“schema_version”: 0,
“attributes”: {
“id”: “datacenter-3”,
“name”: “Home-Datacenter”
}
}
]
}
]
}

In summary, we have looked at how to find various providers to use with terraform, how to call a sample provider and what constructs are created when the init, plan, and apply functions are used with the local terraform binary. Fortunately, none of this changes if you are using Windows, Linux, or any other operating system. The provider directory under the .terraform tree contains the binary to translate from local API calls to API calls on the target system. This is a simple example but gives a good overview of what a good and bad connection into a vSphere server looks like and how to troubleshoot the connection. This construct should also work for a direct connection into an ESXi server without having to spin up a vSphere management instance.

Supporting multiple providers

One of the key uses of Terraform is to deploy development and production systems. Terraform can be used to manage what is deployed, manage resources, and restrict resources available to an instance. In our last blog entry we looked at the vSphere provider and looked at some of they key parameters that are needed to deploy solutions into this virtual environment.

In a perfect world we should be able to develop definitions to deploy development systems to a small or older system, deploy production to a more expensive and powerful vSphere cluster, and a disaster recovery copy to make sure that we can failover to an alternate datacenter in times of emergency. We should then be able to take the data for this provider and move it to Amazon AWS or Microsoft Azure or Google GCP by just changing the provider. Unfortunately, this is not a perfect world and there are a ton of reasons that this won’t work.

If we look at the documentation for the AWS provider we note that we don’t need a username and password or IP address but rather need a public and private key to connect to an AWS serviced and these parameters can be provided by command line environment variables. We can also define multiple providers and give an alias for the multiple providers and deploy services into different accounts, regions, and zones based on the terraform provider definition.

A typical aws provider main.tf file looks like…

provider “aws” {
version = “> 2”
profile = “default”
region = var.dev_location
alias = “dev”
}

provider “aws” {
version = “> 2”
profile = “default”
region = “us-west-1”
alias = “prod”
}

allowing you to deploy resources into “aws.dev” or “aws.prod” with a variable.tf file containing nothing or

variable “createdby” {
type = string
default = “TechEnablement”
}

variable “environment” {
type = string
default = “TechEnablement”
}

variable “dev_location” {
type = string
default = “us-east-1”
}

With this variable.tf definition you need to define environment variables to define the AWS_ACCESS_KEY_ID and AWS_SECRET_ACCESS_KEY or define shared_credentials_file in a terraform configuration file to point to the location of a key file. On Windows this is typically “%USERPROFILE%\.aws\credentials”. The format of the credentials file looks like

[default]

aws_access_key_id=AWSSAMPLE7EXAMPLE

aws_secret_access_key=long/keywith/numbers4&letters

Unfortunately the vSphere provider does not allow for an alias tag and use of different account credentials and vsphere host address. Rather than defining multiple providers you need to define different directories and different variable.tf and main.tf files for each of the environments. In our earlier example we would have a dev, prod, and dr folder under our main folder. Each folder would have terraform configuration files to define what each environment would look like and resources available.

A typical multi-environment tree would look different from out initial single tree deployment with a dev, prod, and dr folder each containing the same main.tf files but different variable.tf definitions. Each folder would have their own terraform.tfstate file as well given that there are different environment variables and states on different servers.

If you try to define multiple vsphere providers in one file you get the error

Given the differences between the two provider types it begs the question of changing the aws provider to the same file format as the vsphere provider and have three different folders that deploy different environments to different servers. This would work but having everything in one file reduces complexity and potential errors by having multiple copies in multiple folders. Editing one does not guarantee changes to the other directories and there might be subtle differences between the different environments, like datastore names or locations as well as network definitions, that are unique to each environment.

In summary, there are multiple ways of solving the same problem. The ultimate solution is to write a generic provider that can deploy services into vSphere, Hyper-V, Nutanix, other on-premises virtual machine hosts, AWS, Azure, Google GCP, and other cloud virtual machine hosts. Given that there is no generic provider that works across all or even multiple environments you have to decide how to deploy multiple terraform configuration files to multiple target locations without doubling or tripling your work and code that needs support and maintenance. My recommendation is to go with different folders for different environments and have different variable.tf and main.tf files in each folder.