Mounting local drive with guest extensions

In the last entry we created a Linux install by creating a new virtual machine and booting from an iso image. This works but is very time consuming every time we want a playground. In this entry we will clone an existing machines using thin cloning, modify the clone, add guest services extensions, mount the E:\ drive to reading, and stage an installation of the 11g Oracle database.

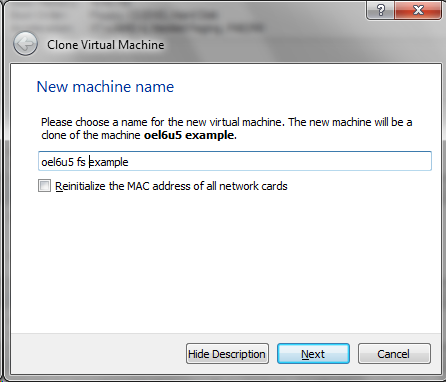
The first step is to clone our existing machine. We don’t want to create a new one because the first one took almost two hours. If we left click on the oel6u5 example and right click we can select Clone…

Screenshot 2015-07-02 17.36.32


We are given the option of a full clone or a linked clone. A full clone takes all of the files that we created (the 40G root disk which is thin provisioned) and makes a new copy of it. The linked clone tracks differences from the old instance and the clone instance. As changes are made to the new instance, they are recorded in a new directory. The old instance is forked and any new changes happen in a new file. The old file preserves a spot in time where the two were the same. Screenshot 2015-07-02 17.36.45


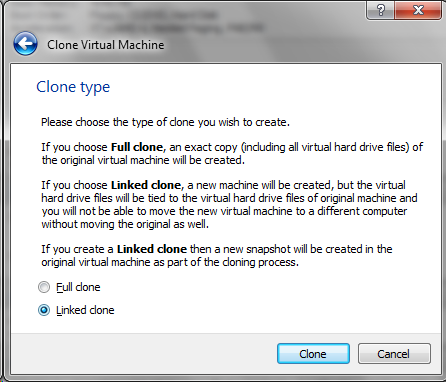
The linked clone comes back almost immediately since no files are copied to create the new instance.

Screenshot 2015-07-02 17.36.51


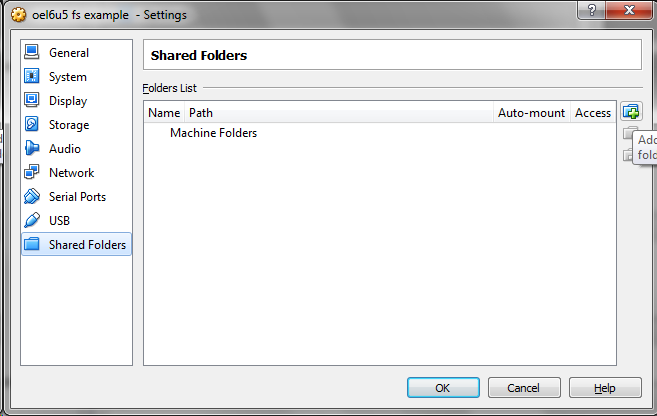
What we want to do is mount the E:\ drive as a media folder inside of our guest operating system. To do this we must go to the settings and select shared folders. We Add a shared folder access point and map it to the E:\ drive. We automount it and make it read-write.

Screenshot 2015-07-02 17.36.59 Screenshot 2015-07-02 17.37.10 Screenshot 2015-07-02 17.37.18


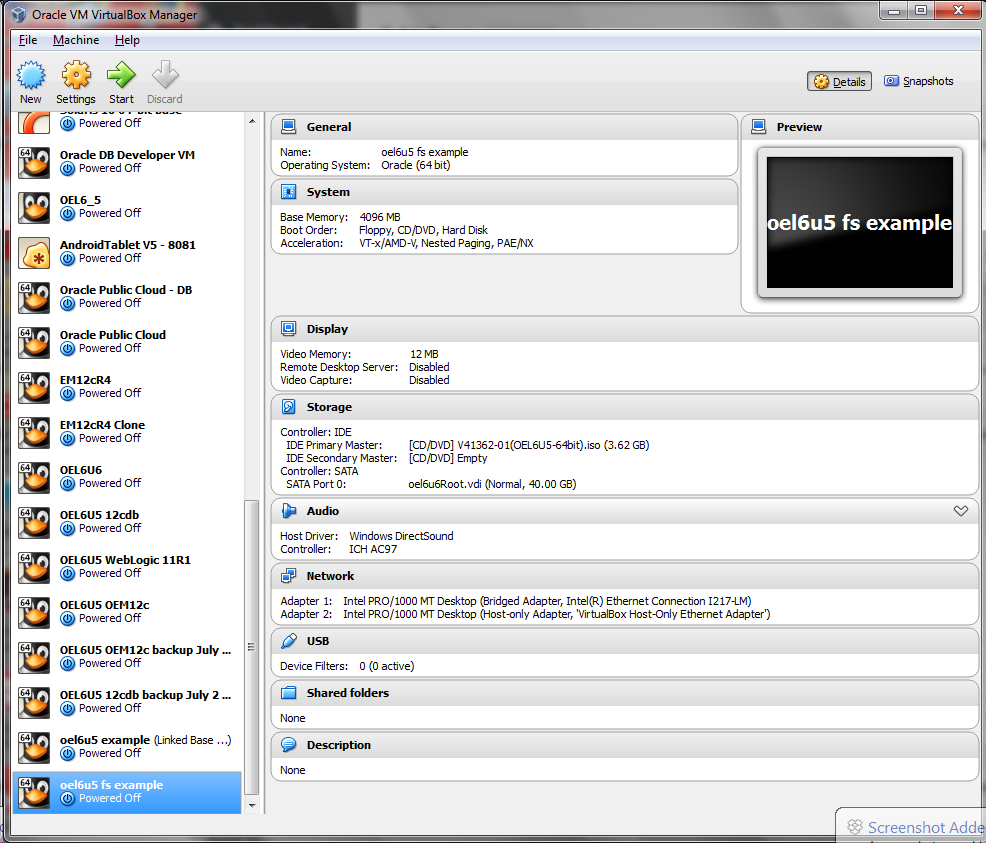
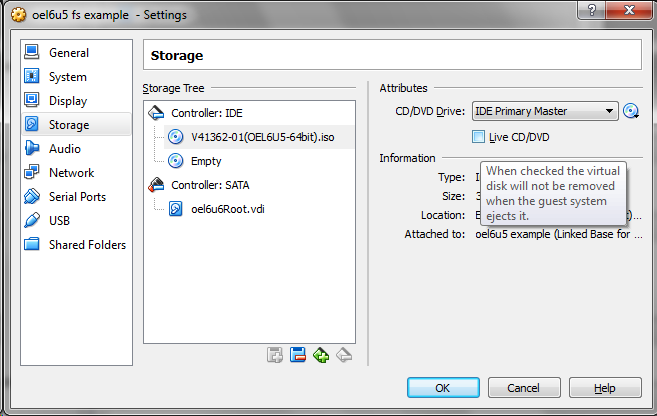
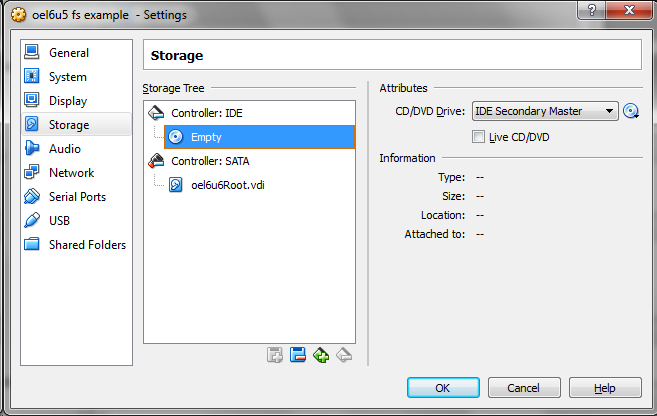
While we are in the setting we also need to remote the CD/DVD since we are finished installing the operating system and want to boot off our new instance. We do this by selecting Storage, selecting iso file that we mapped, and clicking on the blue icon at the bottom with a minus sign in it. This removes the CD from our mapping and we boot from the hard drive that we used for our installation.

Screenshot 2015-07-02 17.37.51 Screenshot 2015-07-02 17.40.30 Screenshot 2015-07-02 17.40.33

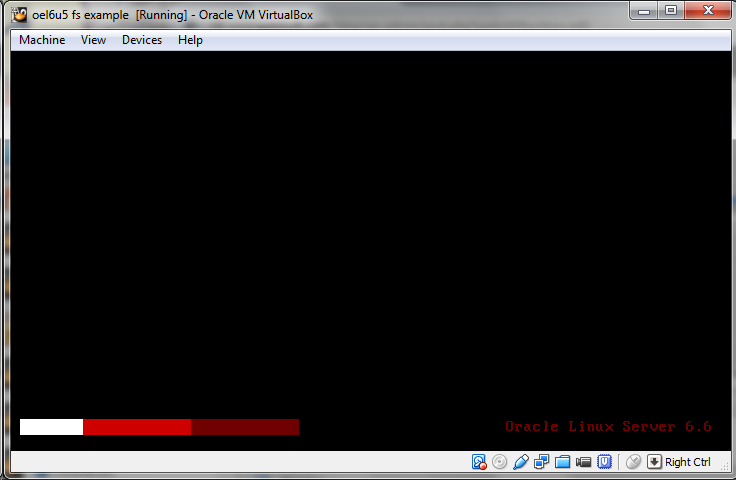
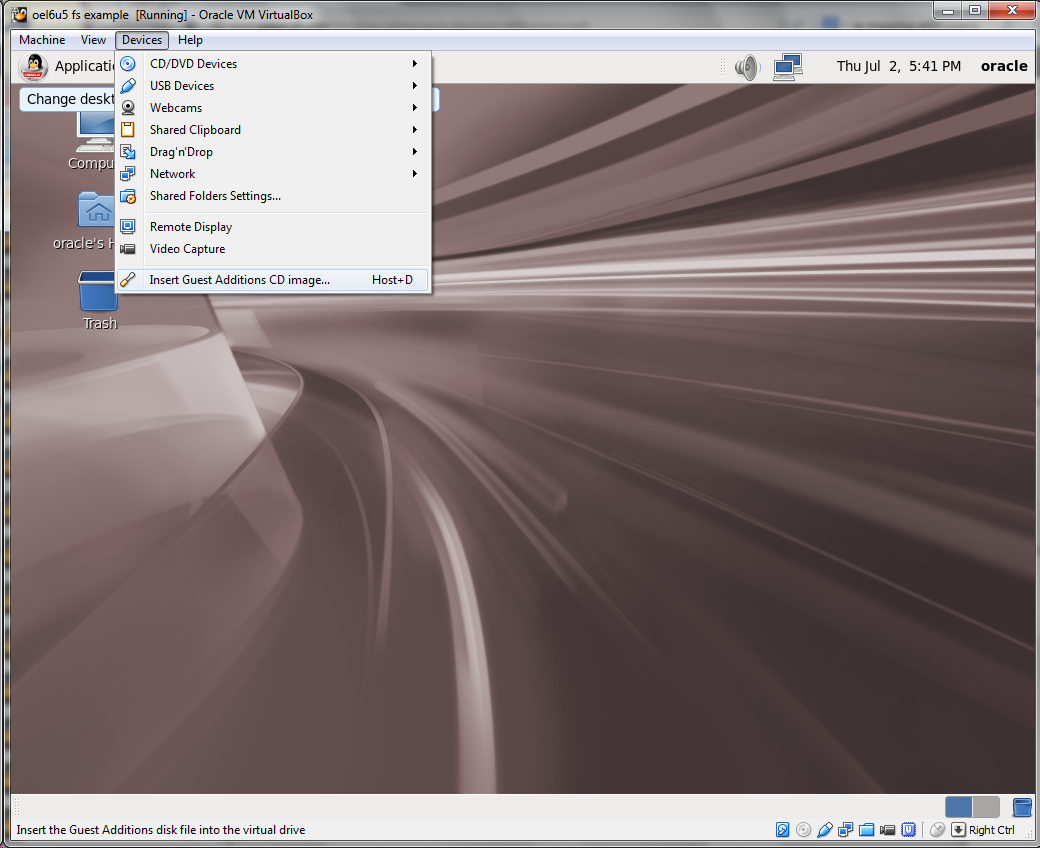
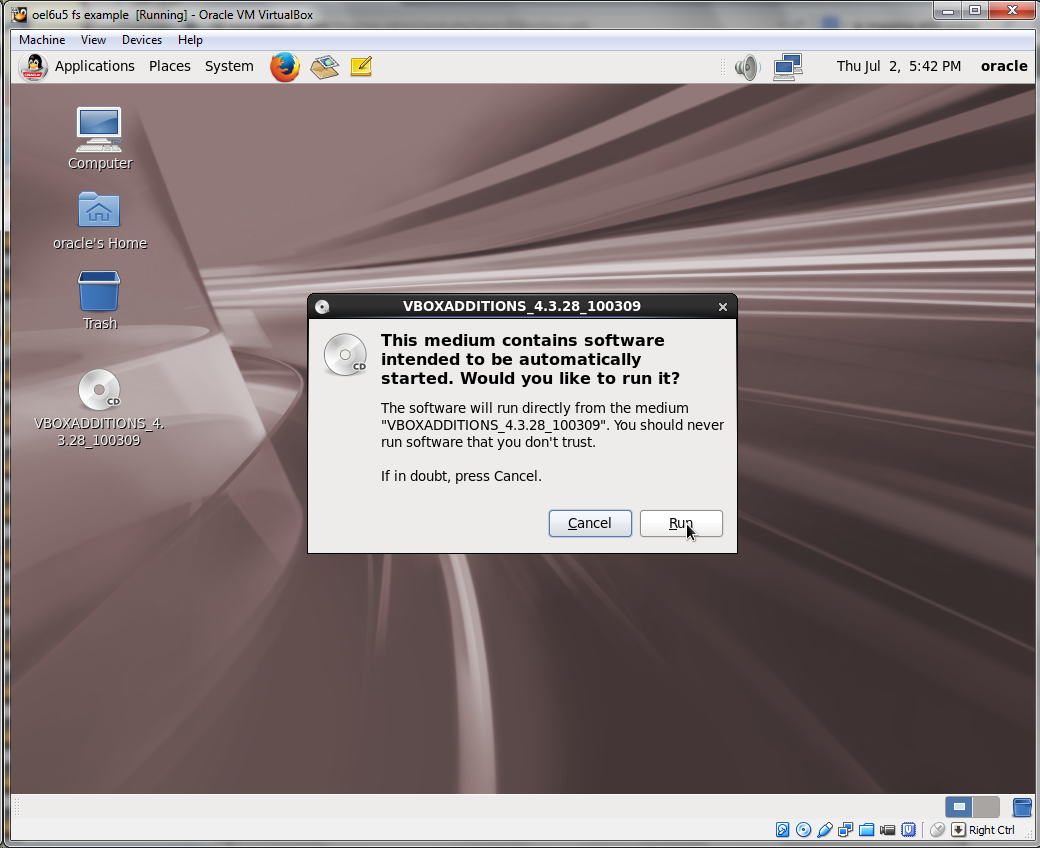
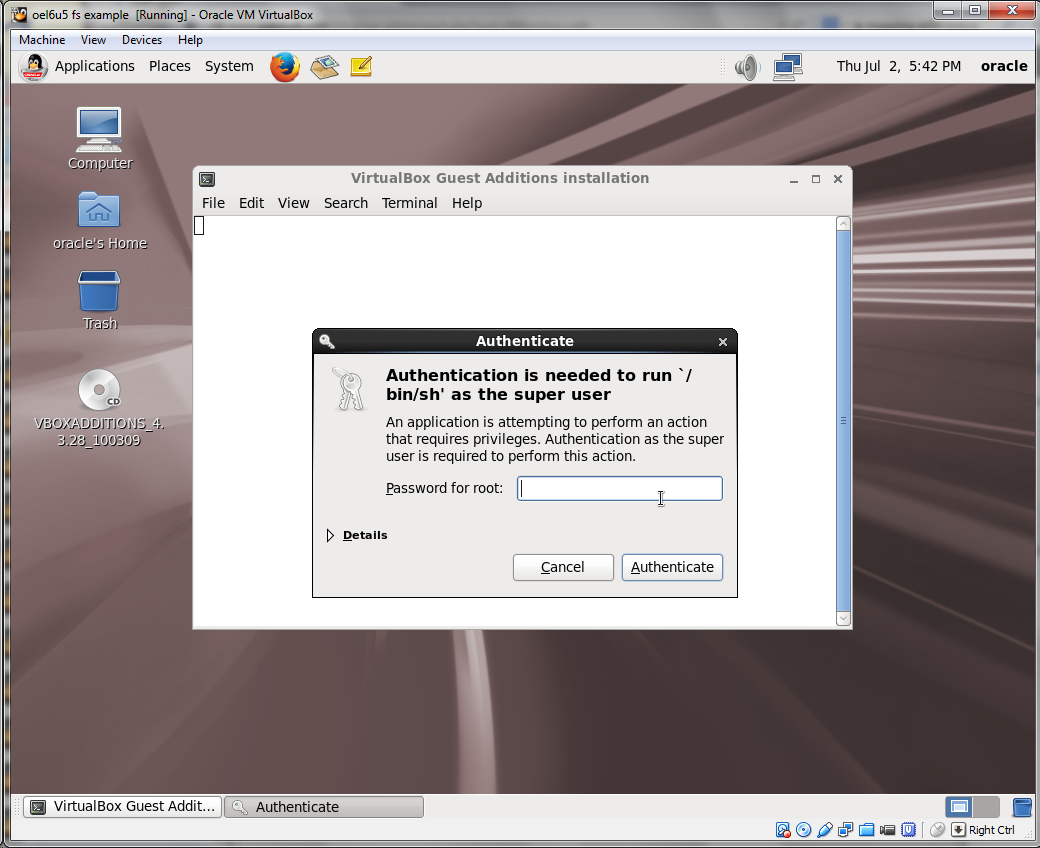
Once we reboot, we log in as the user oracle and add the guest services extensions. This is done by going to the top menu bar in the VirtualBox window and selecting Insert Guest Additions CD image from the Devices menu. This mounts the CD and asks you if you want auto-run the content.

Screenshot 2015-07-02 17.41.00 Screenshot 2015-07-02 17.41.50 Screenshot 2015-07-02 17.42.05 Screenshot 2015-07-02 17.42.15 Screenshot 2015-07-02 17.42.23 Screenshot 2015-07-02 17.43.13

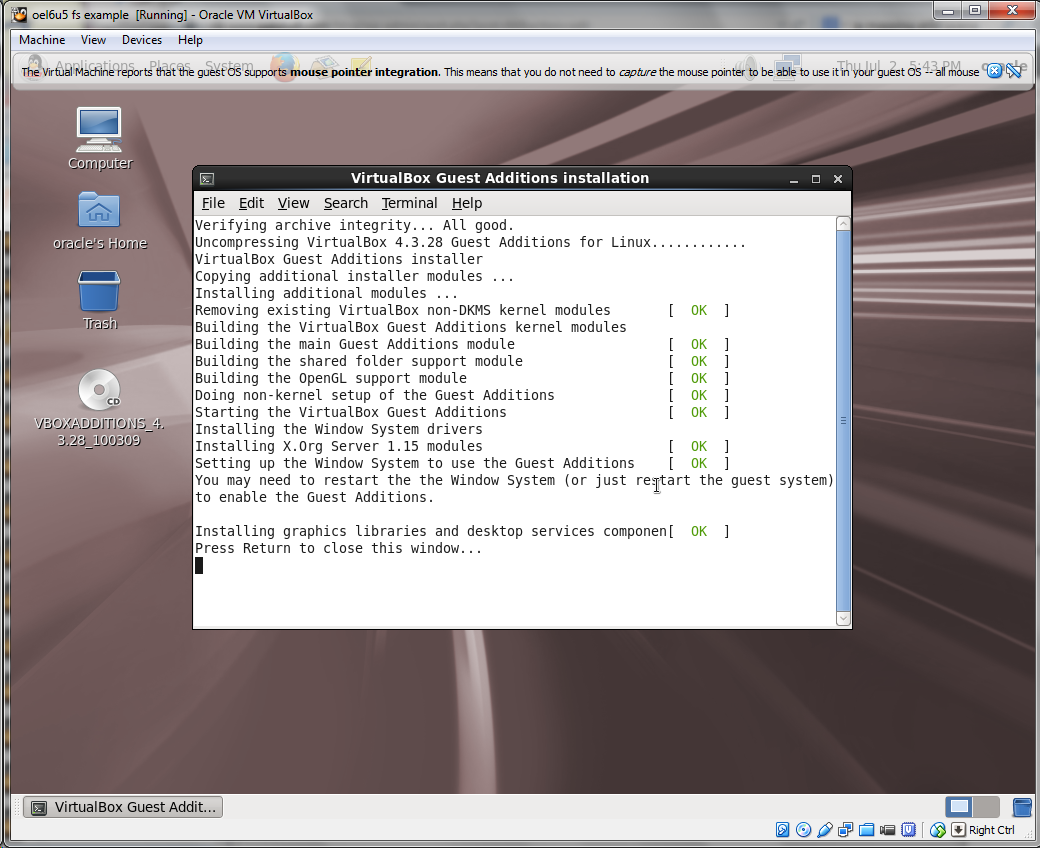
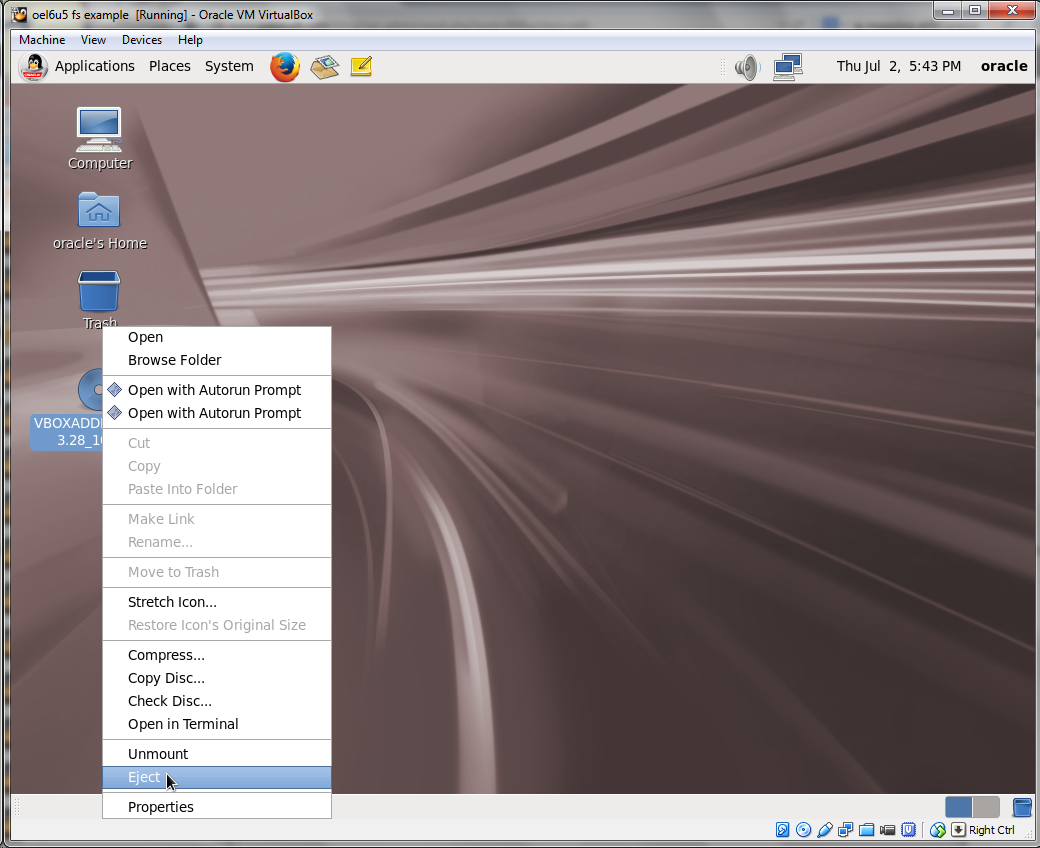
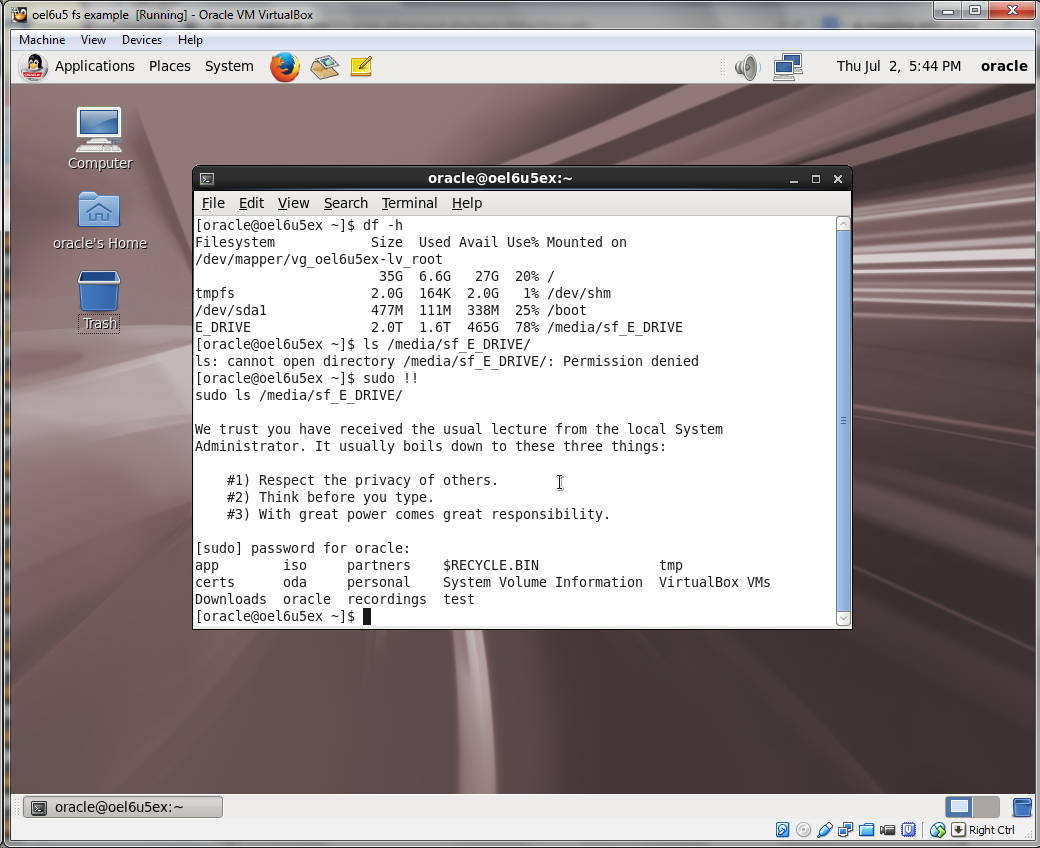
Note that kernel modifications were made to map the local drive to a mounted resource. We can eject the guest services CD and verify that the file system is mounted.

Screenshot 2015-07-02 17.43.27 Screenshot 2015-07-02 17.43.49

It is important to note that the /media/sf_E_DRIVE is readable only by root. We can copy data from this location to a local location as is needed for database installation or just access the data as root.

Screenshot 2015-07-02 17.44.16 Screenshot 2015-07-02 17.45.58

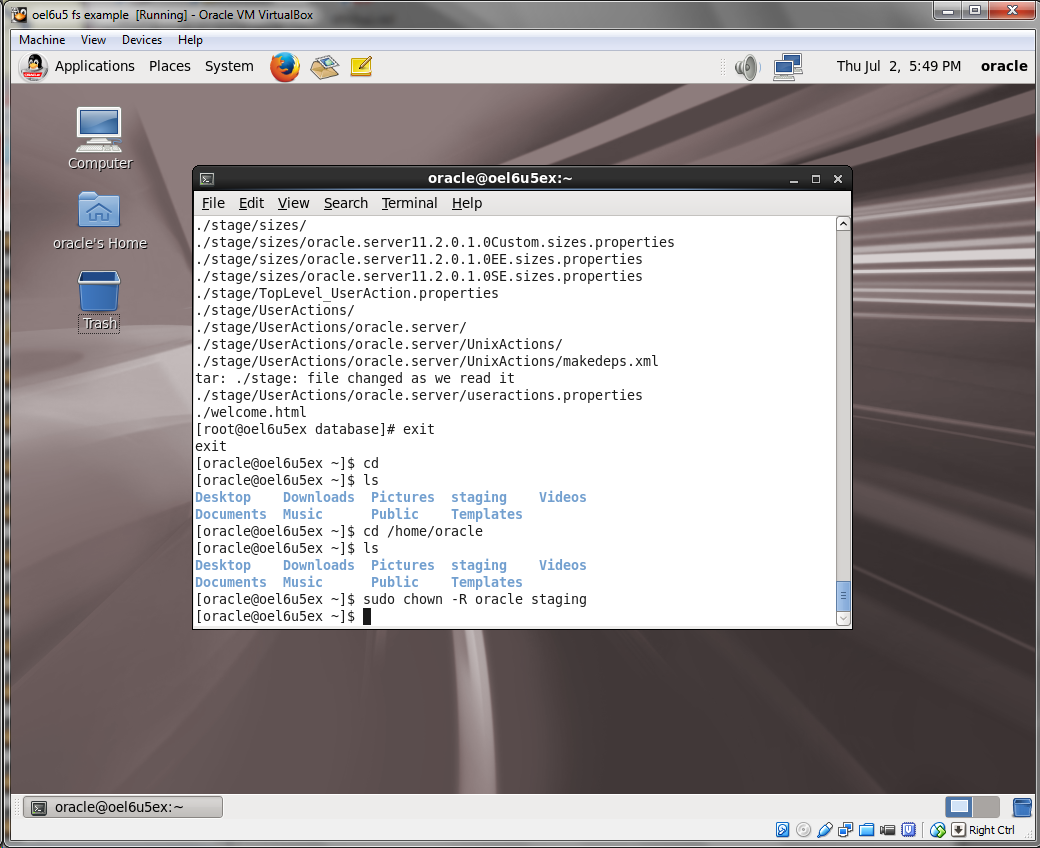
Before we install the 11g database we will want to change the hostname of this machine. We will keep the ip address the same but change the hostname by editing the /etc/hosts and /etc/sysconfig/network files. We will also need to change ownership of the staging directory back to oracle with the chmod -R command to make it owned by oracle for the installation.

Screenshot 2015-07-02 17.49.42 Screenshot 2015-07-02 17.50.13 Screenshot 2015-07-02 17.51.12 Screenshot 2015-07-02 17.52.13

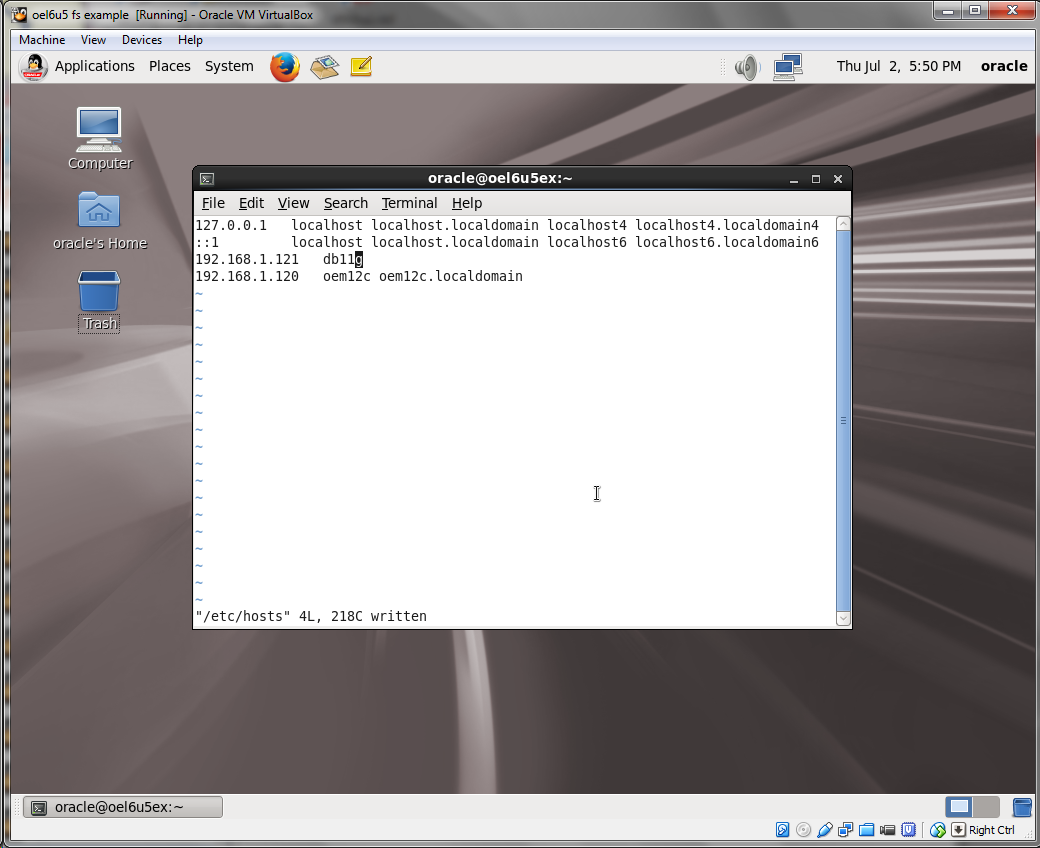
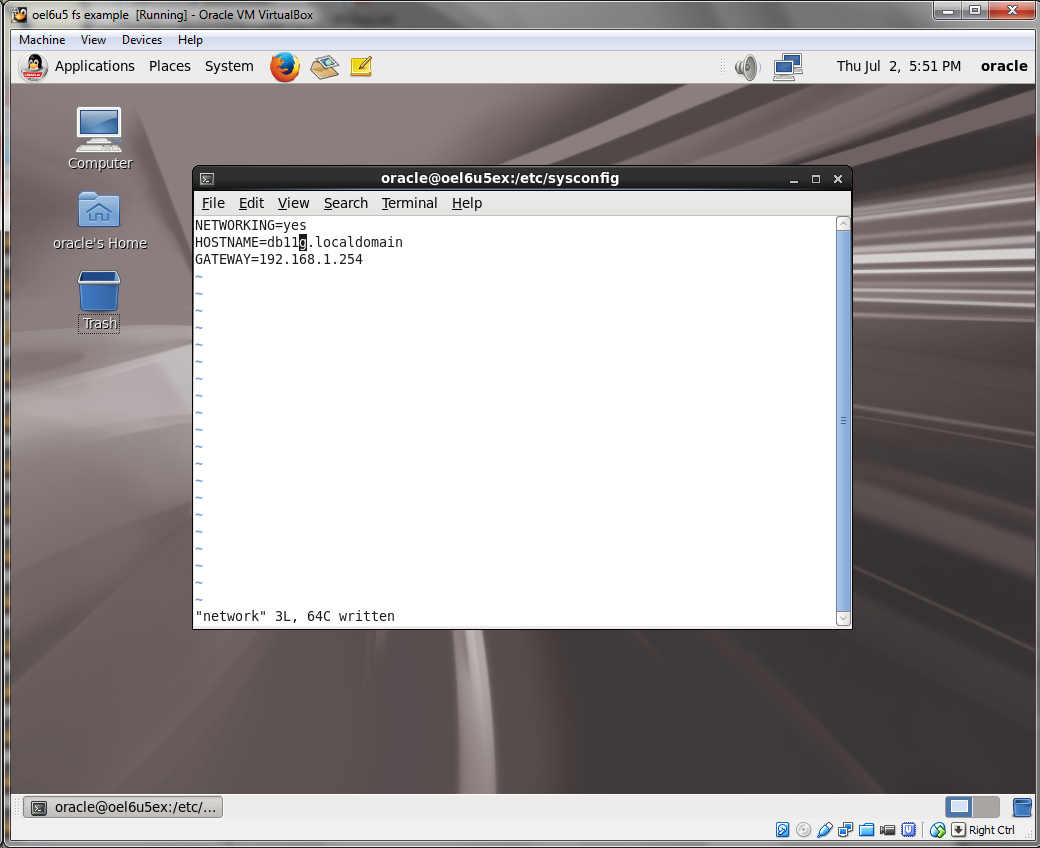
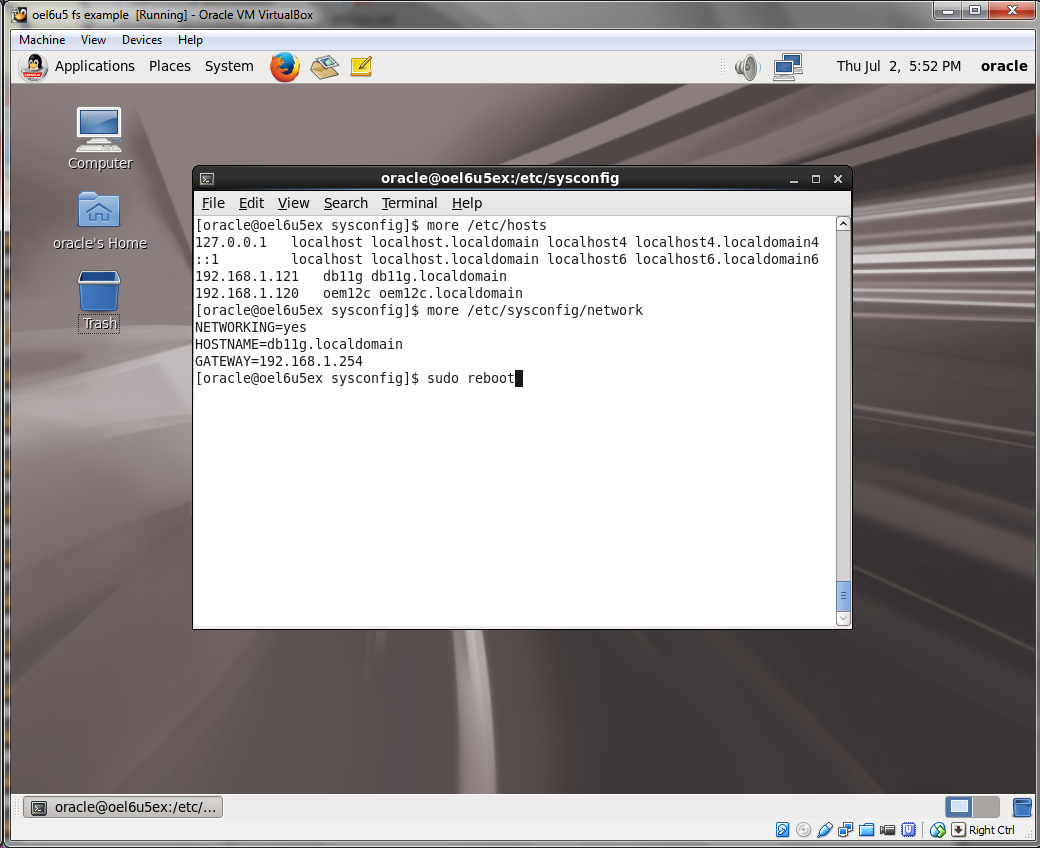
In this example we change the hostname from oel6u5ex to db11g since we are staging to install the 11g instance of the database. We could have changed it to db12c if we were going to stage the 12c instance of the database. The process and procedure is the same with the exception of the hostnames and which database binaries we put into the staging area.

up next: installing the 11g database into our sandbox

Test platform

The easiest way to play with technology is to create a test platform that works for you and allows you to create a playground or scratch environment. Historically you had to purchase a computer, install and operating system on the computer, and install the software on the operating system. This was very cumbersome. Getting a dedicated computer to play with was initially expensive. Getting the OS installed and configured to work in your network was overly complex and typically required an OS license. Once you had the OS stable you were free to play with software installation and configuration. The key problem was that if something went wrong or something locked up the computer it was back to square one and re-installing and re-configuring the operating system.

Fortunately a few years ago virtualization became something that not only gave you a safe sandbox but became mainstream computing. There are currently three primary platforms for virtualization: VMWare, HyperV, and ZEN. All three have server solution. All three have desktop solutions.

With VMWare there are a variety of products that you can play with.  For desktop solutions, VMWare Fusion is a good solution. You can play with it for free but a licensed version is $70. It does require a modern Intel chip set (or AMD) with 64-bit capability and at least 2G or RAM and 1T of storage. Server solutions are out of the question for individuals but excellent if your corporation has standardized on it as a platform and provides you a sandbox to play in. The VMWare VCloud is a good hosting platform to play with if you have the money and resources but do not have a VMWare server in house to play with. Starting cost of VCloud is $670 per month and can grow as you require more resources. One of the key benefits is that what you develop in Fusion can migration to ESX/VMWare Enterprise to VCloud easily.

With Microsoft, HyperV is bundled into Windows 2012 and newer. You can run a virtual instance inside of Windows but it does require that you have a valid Windows OS license as the base operating system. Unfortunately, migrating HyperV instances from a private hosted environment to a public cloud environment like Azure does not work well and has different file formats. We will not be looking at this option because 1) it cost too much for me to play with (I have a Windows 7 desktop and can not get a server 2012 edition installed on my system to play with) and 2) if our goal is to migrate our examples to the cloud the lack of functionality to migrate these instances to the cloud are show stoppers.

With Oracle, there are two solutions Oracle VM (a Zen based hypervisor) and Virtual Box. Oracle VM is a server solution that is bundled into products like the Database Appliance or the Virtual Compute Appliance. It is also part of the Solaris operating system and works on Sparc and X86 platforms. We will be focusing on VirtualBox since it is a desktop solution that works on MacOSX, Windows 7, and Linux. We can configure a desktop system to be our sandbox at no cost. One of the benefits that I appreciate is the fact that you can add the extensions for your operating system and share drives with the guest OS. This allows you to stage installation binaries in a directory and not have them consume disk space in your virtual machine. This is a common practice in corporations and cloud hosting like Amazon Web Services. You create an S3 storage pool that contains all of you install binaries and mount this on your virtual machine. You can keep your virtual machine smaller and cross mount the installation files across multiple machines without consuming the disk space on all of them. We will be looking at VirtualBox because I did not want to use my laptop as my primary computer and install OracleVM on my deskside computer. I ordered a deskside Linovo computer with 24G of RAM and 3 terabytes of disk to act as a playground. The system came installed with Windows 7 and very little else installed on it since it is the Oracle Desktop standard image.

I mention the AWS service. We could use this as a playground. It is a valid alternative. We will not be looking at this initially because it involves a cost for storage and a cost for compute resources. Pricing for instances are reasonable ranging from 1.3 cents per hour ($113.88 per year)  to $2 per hour ($17,520 per year). They do have a year free on the cheapest services but in my opinion these services are too limiting to play. You get one virtual CPU and 1G of memory. The key benefit to this configuration is that you get a copy of Windows for free so if your testing platform is Windows then it might be a good alternative. The Oracle database requires at least 4G of memory to run without being painfully slow. Layering WebLogic on top of it and Enterprise Manager boosts the requirement to 6G or you are watching the processor spin while it thrashes memory.

There are a variety of other services that you could lease similar to AWS. Oracle has compute infrastructure as a service at $2,190 and up per year. Rackspace, Level 3, Google, and other hosting vendors are alternatives. My recommendation is to look at what works for you and stick with it. We will be using VirtualBox as our preferred platform because instance created in this sandbox can be exported to AWS, VMWare, and OracleVM. This platform is also free for a variety of platforms and has enough features to fulfill our needs and requirements.

Our sandbox system came down to cost. We selected a deskside Linovo M83 system at a cost of $1,364 because it can handle the extra memory that is needed. A laptop is typically limited to 4-8G of RAM. We don’t need the graphics capability of a gaming system or the added processing power. We went with a 4 core Intel i7-4770 chip at 3.4Ghz. This system was selected primarily for the memory expansion. The system can handle 36G so we have some headroom if needed. We could have selected AWS or Oracle IaaS as the testing platform but given that my department had budget for me to get a new computer I opted to keep my personal MacBook Pro as my laptop and have Oracle purchase the deskside as my daily “working” computer.

next: VirtualBox installation and configuration