Raspberry Pi install

This is the start of a tutorial to help build a simple platform for robotic control and simple display options. We will start with a Raspberry Pi 4 and Raspberry Pi 5 as the initial platform. In the future we will look at an Arduino board using the Elegoo.com super starter kit Uno R3 Project kit.

This kit contains a bunch of electronic projects as well as an Arduino UNO R3 microcontroller.

Raspberry Pi

The Raspberry Pi 5 is the latest release of a microprocessor board release from raspberrypi.com.

This processor board was released in October of 2023 and is now generally available with 4 GB or 8 GB of memory for between $60 and $100 depending upon where you purchase the memory options.

The Raspberry Pi 4 is a lower power system with similar memory configurations starting at $35 and was released in June 2019.

The main difference between the Raspberry Pi 4 and Raspberry Pi 5 are processing power, display options, and expansion options

Both require a memory card to help boot the operating system and either a WiFi connection, ethernet connection, or keyboard/mouse/HDMI monitor to configure and setup the system.

The first key difference that will be obvious between the two boards is how they get power. The Pi4 gets power from a USB-C power adapter that is limited to 15 Watts (5 Volt/3 Amp minimum). The Pi5 needs a different power supply adapter that can power upto 27 Watts of power (5 Volt/5 Amp maximum).

The microSD memory card is inserted into the back of the Raspberry Pi. This memory card contains the operating system and file system that controls the microcomputer.

The only limitation for the microSD card size is the filesystem size for Linux. The physical size is restricted by definition so the size that we are talking about is the storage capacity. As of this posting in 2014, a 2 TB microSD card is the largest available on the market. The ext4 filesystem on Linux is 256 TB so there is plenty of room for larger microSD cards when they are available.

To get the operating system on the memory card, another operating system like Windows 10 or MacOS are needed to copy the OS image from the internet to the memory card. A USB to memory card adapter is needed.

Not all USB to card adapters can handle a microSD card and might need an adapter to handle the larger card slot.

A good place to start for imaging the operating system is https://www.raspberrypi.com/documentation/computers/getting-started.html which details the parts and software needed for both the Raspberry Pi 4 and 5. The software for Windows can be found at https://www.raspberrypi.com/software/ and is relatively easy to install but does require admin rights to allow you to communicate with the USB port/memory card. The software is relatively simple to use and has three options for installation.

The first option is to select the device (Raspberry Pi 4 or Raspberry Pi 4 or older models) .

The second option is which flavor of the operating system to install. The initial recommendation would be to install a full desktop that allows for connection via keyboard/mouse/HDMI monitor or remote connection across the WiFi network or ethernet network. At some point you might want to install a “headless” system that can only be connected to through a network connection and is typically only a terminal connection and not a full desktop experience. This configuration requires a bit more knowledge of Linux command line options and how to manipulate/configure your system.

You can install a 64 bit or 32 bit operation. The recommendation is to install the 64-bit configuration initially until you find a need for the 32-bot configuration or an application that requires 32-bit only.

The final configuration option is to select the microSD card that gets mounted on the Windows operating system. The drive name and device type will typically be different than this screen shot.

The final option is to configure the WiFi adapter, user/password, and hostname as part of the installation. This is done by clicking on the Edit Settings which gives you access to the optional configuration screens.

In this example we configure the network, add a user, and define the hostname. You will typically need to modify each of these entries to fit your needs.

It is suggested that you configure SSH at this point by going to the services tab and enabling the SSH option.

The simplest recommendation is to use password authentication until you are more familiar with secure shell and using secure communications without a password.

Once all options are defined, write the operating system to the memory card and eject it from your computer.

The copy operation will take a few minutes and write then verify the operation.

Take the microSD card and insert it into the back of the Raspberry Pi. The slot is the same for the Raspberry Pi 4 and Raspberry Pi 5.

Attach the power supply, ethernet cable (if used), keyboard, mouse, and HDMI connector to the Raspberry Pi.

At this point you should see a desktop screen on your monitor/TV and have a successful operating system installation.

Installing Terraform on Ubuntu

Welcome to an ongoing series of Terraform tips, tricks, and tutorials. On this journey we are going to look at what it takes to use Terraform to manage resources running in VMware, Azure, AWS, and Google cloud. We will look at the differences between running Terraform on Linux and Windows and show examples of both. The assumption is that you know what Terraform is and just need to know how to do things with it. In a previous blog, we discussed how to install Terraform on Windows. In this blog we will look at installing Terraform on an Ubuntu 18 server.

For these examples we will use a VMware generic deployed instance so that we can go back to the same system and build upon the previous posting of how to do something. For this example we install a generic Ubuntu 18.04.5 desktop instance. We could just as easily have done this from a server instance and done everything from the command line using wget to get the Terraform binary.

Rather than using the wget command and having to figure out which version of Terraform to download we use the Firefox browser and go to http://terraform.io to download the binary.

If you forget the Terraform website you can easily do a search for the term terraform download ubuntu which returns a variety of tutorials and the HashiCorp Terraform site. Scrolling down on the site we see a variety of operating systems that are supported for the Terraform platform. Select the Linux 64-bit from the list to download.

Once the download is finished we need to unzip the binary from the zip file. Prior to unzipping the file we need to install the unzip package. This is done on Ubuntu with the apt-get command

sudo apt-get update

sudo apt-get install wget unzip

The update command makes sure that all patches and updates are installed. The install command makes sure that the wget (which is not necessary for this example) and unzip are installed. Once the unzip command is installed execute the unzip command to extract the terraform binary.

unzip terraform_0.13.4_linux_amd64.zip.

The askubuntu website has a good cookbook on how to perform this installation and testing of the binaries.

The last step to getting Terraform installed on Ubuntu is to place the terraform binary in the path of the current user. Rather than placing this in a user specific bin directory it is best practice to put binaries like this in /usr/local/bin to be used by automation scripts and other users on this system. We can either copy or move the binary to this location using the sudo command to write to a root protected directory.

sudo mv terraform /usr/local/bin

Once the binary is relocated we can test the terraform binary by typing

terraform version

terraform

These commands not only test the binary but test that the binary is in the proper path to be executed.

At this point we have a terraform development platform that can be used to provision systems and services on a wide variety of cloud and virtualization platforms. To see this process in action, watch a video capture of this procedure.

In summary, installation of Terraform on Ubuntu is relatively simple. The three minute video shows everything required from start to finish to get a Terraform platform configured to be used from a terminal.

some additional blogs for a different perspective

Installing Terraform on Windows

Welcome to an ongoing series of Terraform tips, tricks, and tutorials. On this journey we are going to look at what it takes to use Terraform to manage resources running in VMware, Azure, AWS, and Google cloud. We will look at the differences between running Terraform on Windows and Linux and show examples of both. The assumption is that you know what Terraform is and just need to know how to do things with it.

Let’s get started by installing the Terraform binary on a Windows 10 desktop system. For these examples we will use a VMware generic deployed instance so that we can go back to the same system and build upon the previous posting of how to do something. The instance that we will be using for our demonstration is a Windows 10 Pro desktop that was fresh installed from an iso file.

On Windows, the easiest way to download the Terraform binary is to open a web browser and go to http://terraform.io to get the latest version. Alternative, you could download a curl or wget package in PowerShell but this gets more complex than navigating to a web location.

It you forget the web address a simple web search using the phrase “terraform install windows” will help find the latest page as well as a few tutorials on how do perform the necessary steps. Unfortunately, the Terraform web page focuses on how to install the binaries onto a Linux or Mac OS platform and not Windows.

To download the zip file on Windows, scroll down to the Windows icon and select the 64-bit link. The 64-bit version is selected because that is the version of the operating system that is installed.

The next step is to extract the terraform.exe file from the zip file. When the file is finished downloading, open a file browser and right click on the zip file name. Select Extract all… to create a subfolder and the terraform.exe binary.

We could say that we are finished at this point but you would have to reference the path of this binary in every execution. What would make the installation much easier is to modify the %PATH% variable to include the terraform_0.13.4_windows_amd64 folder in the path. To do this, open up a control center window from the start menu by clicking on the start button (or key) and typing control center or environment variable. From here you can modify the path for the user or system wide based on what you select from the control center window.

In this example we change the local path rather than the path for all users. To change the path, click on the path listing the click Edit. Select the location of the terraform.exe folder and add it to the path.

To test the installation, open a Command Console or PowerShell and type

terraform version

terraform

At this point we have a terraform development platform that can be used to provision systems and services on a wide variety of cloud and virtualization platforms. To see this process in action, watch a video capture of this procedure.

In summary, installation of Terraform on Windows 10 is relatively simple. The three minute video shows everything required from start to finish to get a Terraform platform configured to be used with PowerShell.

Some different blogs to give you a different perspective

mason jar bourbon

I taste tested a few of my mason jar aging experiments this weekend and the results were surprising.

2016-01-30 11.30.25

The Whistlestop with a light char was my favorite. It almost makes me want to try an uncharred piece of oak just to see what it does. The flavor changes after three weeks into a smoother bourbon. The color is a light golden brown and gets darker and darker every week.

2016-02-13 14.15.19

The light char got rid of the acidic after bite that the white whiskey has and makes it a little smoother. It still smells very much like moonshine but has other smells associated with it.

The dark char has a smoky almost burnt flavor. My hopes are that this will fade over time. I could tell a big difference between the light and dark char. I might need to experiment with different levels of char and how long the chips are allowed to cook in the cast iron box to get different levels of char.

The hickory wood is my least favorite. The flavor was not what I expected and took on almost a rancid flavor. I was glad that I had crackers close by. The flavor was not smooth and not something that I would repeat. I will give it a few more months but I have little or no hope that this will work. It does make me want to try other woods to see what the differences are. I do have some apple and pecan chips that might be worth experimenting with.

I decided to fill my 5 liter cask with Weller Special Reserve and see if I could smooth the flavor with the oak barrel. I first hydrated the cask with water for a week and rinsed it out. I then put three 1.5 liter bottles in the cask and let it sit for a week. The flavor changed but not as much as the mason jar experiments. My guess is that the cask is a light char. Since I got it as a present I have no clue how much char there is inside. I like the flavor and look forward to seeing how it mellows as the weeks go on.

2016-02-06 11.59.14

Status update:

mason jars: 3 weeks on the shelf, flavor changed after week 1.

oak cask: 1 week on the shelf, flavor smoother after 1 week.


different kind of homebrew

For Christmas I got a small keg to age something in. I did not want to just dive straight into aging bourbon without experimenting first so I did a little research.

2016-02-06 11.59.14

It turns out that aging distilled spirits is not something new but has been around since the history of our country. Who knew? Some of the interesting sites that I found suggested first trying a small quantity in a mason jar with wood charred and placed in the jar with the whiskey. A few of those sites are

There are also a ton of companies that will “help” you start your project.

So loaded with research material and a bunch of mason jars, I thought what did I have to loose?

2016-01-30 10.39.39

I went ahead and collected what I thought would be all of the necessary components. Given that I love to experiment I wanted to try oak and hickory chips as well as white whiskey, moonshine, and bourbon as the base.

The two types of chips that I got were Jack Daniels Oak Barrel chips used for BBQ smoking (Ace Hardware) and Hickory chips for flavoring.

2016-01-30 10.41.052016-01-30 10.41.29


The blogs that I read suggested burning the chips and placing them in a mason jar with the white whiskey. I wanted to do this in a controlled way so I measured 2 cups of white whiskey and 50 grams of chips. I experimented burning the chips with a dark and light char as well as burning them by hand with a butane torch and with a smoking box in side a grill.

2016-01-30 10.45.04 2016-01-30 10.45.20 2016-01-30 10.47.26 2016-01-30 10.54.39

The three liquids that are being experimented with are White Whiskey, Moonshine, and Weller Reserve Bourbon.

2016-01-30 10.40.49 2016-01-30 10.40.56 HDR 2016-01-30 10.41.01

First I put light charred chips into a mason jar and added 2 cups of White Whiskey. Everything that I read suggested getting something with the highest proof because it will absorb the flavor of the wood better than a lower, watered down concentration. The Rio Brazos Whistlestop is 90 proof. The Palmetto Moonshine is 105 proof. The Weller Special Reserve is 90 proof.

2016-01-30 10.55.27 HDR 2016-01-30 10.55.27 2016-01-30 10.57.38 2016-01-30 11.00.48 HDR 2016-01-30 11.00.48 2016-01-30 11.14.21

I put blue painters tape on each jar to label if it was light or dark char, if it was hickory or oak chips, and if it was Weller, Whistlestop, or Moonshine.

Everything that I read said don’t expect much change over the first week or two. The color changes very quickly but the flavor does not change. I stored the mason jars in the garage because the temperature variation helps the wood absorb and express the whiskey. The smaller container ages everything at a faster rate since you have a higher liquid to wood ratio. What would typically take 3 years should take 2-3 months. My hope is to sample the different containers and see if it gets better over the weeks/months.

I did sample the Weller a week later to see if the flavor changed and was very surprised how much it changed. The flavor took on a smoky and woody taste. I am not sure if it is something that I like but it had less of an acidic after burn but also tasted oversmoked. My hope is that it will settle down and smooth out as the liquid pulls from deeper and deeper in the wood.

2016-01-30 11.30.25

After my initial experiment I did put samples on the shelf and filled my 5 liter cask with Weller. Given that Weller and Whistlestop costs the same at our local liquor store I wanted to start with aged bourbon and see if I could change the flavor.

It is important to look at the economics

Simple experiment – $60, mason jars, smoking box, chips, 1 liter liqueur of choice.

Full Barrel – $260, oak barrel, 4.5 liter liqueur of choice, smoking box, chips.

I also ordered some test tubes with cork stoppers ($12 for a dozen) so that I could pull half a shot a week to test the taste. I label the corks with a number representing the week that it was pulled and plan on doing a vertical sampling after month three.

2016-02-13 14.15.19


multi-sided box/bucket

In the last post we looked at creating a four sided box that could be used as a bucket or planter box. The idea is to build a wooden cask or barrel by eventually increasing the number of sides or staves required to help the cask stay together and hold water without using glue. We build two versions. The first has straight sides and creates a 4x4x4 cube. The second is a little more complex and creates the same cube but reduces the bottom of the cube to 3 inches.

4_4_wood_planter 4_3_wood_planter

What would it take to make a six sided box of the same design? If we go to our on-line angle calculator we see that we need to cut the angle at 30 degrees rather than 45 degrees. The big question becomes how wide each side or stave should be.

six_sided

We want the entire piece to fit into a 4 inch square so we need to use geometry to calculate the length of each board. Two things that we know from the design are that three of these sides need to fit into four inches. This gives us The total width of the three sides combined. We also know that the total height of the three sides combined needs to fit into two inches. From this we can calculate the length of each board.

IMG_1306

There are a few things to note. First the middle piece is parallel to the centerline. From this we can create a right triangle from the inside edge cut. We know that the thickness of the wood is 3/4 of an inch so we know one side of the triangle. We also know the angle of the resulting cut to be 60 degrees because we move the 30 degree part with the table saw. Using an online geometry assistant we can calculate the length of the wood remaining from the cut. If we draw a straight line at 90 degrees to the centerline we know the angle is 30 degrees and the height of the triangle is two inches. From this we know the angle and adjacent and want to calculate the hypotenuse.

adjacent-opposite-hypotenuse

We can calculate the Hypotenuse with one of the following equations:

SOH…
Sine: sin(θ) = Opposite / Hypotenuse
…CAH…
Cosine: cos(θ) = Adjacent / Hypotenuse
…TOA
Tangent: tan(θ) = Opposite / Adjacent

H = A / cos(angle). We know that A is 2 inches and the angle is 30 degrees. It is important to realize that Excel uses radians so the outer length of the wood (hypotenuse) = A / cos (angle / 180 * pi()) = 2 / cos(30/180*pi()) = 2.3094. This is perfect because we can use this to cut the width of our board. We need to cut it 4 inches high with a 90 degree cut. We then reset the table saw blade to 30 degrees and cut one edge then set the blade guide to make the second cut 2.31 inches wide. The outer edge to outer edge will be 2.31 inches long. The inner edge will be (2 – 3/4) / cos(30/180*pi()) or 1.443 inches.

six_sided_box

The next exercise is to build the tapered bucket where the top is four inches and the bottom is three inches.

six_sided_tapered_box

The angle that we used for the four sided box translates here as well. The top of the box ends up being 2.31 inches. The bottom of the box can be calculated by using the 1.5 inch centerline with a 3/4 inch thick wood at a 30 degree angle. This calculates out the width of the bottom of the taper to be 1.732 inches. Using the on-line calculator the blade tilt should be 29.7 degrees. This results in a cut of six pieces that should fit together.

IMG_1308 IMG_1307

The resulting physical boxes look like

IMG_1309

Note that we use blue painters tape to hold the pieces together. We are close to being a round so a metal band might or might not hold the box together. We are getting close. Next up, an eight sided box is the next project. We might need to increase the size of the box because the width of each board is getting a little small when you try to cut it with a table saw. We will probably try to fit this into a 8 inch square because it basically just doubles all of the measurements.

real math – real wood

Something that peaked my interest during the holiday break was Bourbon and Whiskey. I was driving back from Austin one day and saw a sign for Bone Spirits Distillery in Smithville, Tx. I stopped and was interested in a local distiller using local corn to produce whiskey, gin, and bourbon. I talked to the owner and he explained how everything is local with the exception of the Rye because you can’t get good sweet rye grass in Texas. The conversation spurred a thought in my head. If we are starting to get local distillers who are producing white whiskey there might be a need for building or buying an aging cask to blend my own bourbon.

There appear to be a bunch of casks available through Amazon or others (Barrels Online, The Barrel Mill, and Deep South Barrels [Pearland, Tx]) for $50-$150 depending upon the size (1 liter – 20 liter). The idea is that you purchase an oak cask that has been charred on the inside and you fill it with the blend that you want. The char of the oak adds flavor and color to the white whiskey to create a blend that you want. front

The idea of creating my own blend appealed to me so I ordered a 1 liter cask. The jury is out on how well it will work. The idea appealed to me so much that I wanted to figure out what it would take to create a cask/keg on my own. I started studying the woodworking details and skills needed to build an aging barrel or smaller cask. It turns out that this is a century (literally century) old process. The early woodworkers were called coopers because they hand cut the wood with hand tools to create barrels. I wanted to see how difficult it would be to build a barrel using modern tools like a table saw, band saw, welder, and other tools.

My initial research shows that a barrel consists of a number of boards that are shaped narrow at one end, fat in the middle, and narrow at the other end. A metal band is placed around the narrow end to pull the wood together and help make it water tight. The construction does not require glue or any adhesive, just wood, moisture, and metal bands to keep everything together. These boards (called staves) have a very predefined configuration so that the fat ends fit together and allow the barrel to roll easily since they are relatively large and heavy. The narrow ends pinch together with a metal band and are pushed out with a circular board that act as the ends of the barrel. The cuts seem relatively simple. download (1) download

I wanted to figure out how complex the cuts were so I started with something a little simpler. Given that a barrel or cask is wide in the middle and symmetric getting smaller at both ends I should be able to build half of this and test fitting everything together before doing a full barrel. Surprisingly this is the design of a wooden bucket or wooden planter. There are plenty of samples and references for wooden buckets.

4_side_bucket oak_bucket

I wanted to start with something simple and work my way up. The easiest was to build a four sided “planter box” that was 4 inches wide at the top and 4 inches wide at the bottom. This would create a simple 4 inch by 4 inch by 4 inch box. I used cedar to create this since it is inexpensive wood and could be used as a planter box. The cuts were simple. The first cut is to get a piece of wood that is wider than four inches and cut four of them to four inches in length. The cut is a 90 degree cut to create the height of the bucket. The next two cuts are done at 45 degrees to create the sides. The first cut creates the reference width. The second cut is done so that the longest edge of the cut is four inches long. The resulting board is four inches tall with flat cuts on each end. The sides are cut at 45 degrees to allow you to fit each side together to form a box. 45_degree_cut

The resulting box looks very simple but does require glue to keep it together. A band around the box will keep the bottom in but will not hold water at the top because it is difficult to get pressure on the joints with a square band across the top and bottom. 4_4_wood_planter

A more challenging cut is to do a tapered box with a 4 inch top and 3 inch bottom. The design is a little more elegant and visually appealing. Again, this design requires glue to fit together but does allow us to practice angle cuts and take the next step in creating more staves or sides to round the bucket more. 4_3_wood_planter

The math behind this construction is a little more complex but not that much more. If we look at each piece of wood we will first cut four 4 inch pieces of wood to get the 4 inch height. We then draw a line from the top corner to half inches inside to get a three inch bottom. You can calculate the cuts required using geometry or cheat and use an online cutting guide. We do have to use a little math to use the online guide. It asks for the number of sides and angle. To get the angle we need to figure out what a 4 inch top and 3 inch bottom angle generates. We can do this because we know the adjacent height (4 inches) and opposite width (1/2 inches) of the triangle that we are trying to create. From this we can calculate the angle as tan(angle) = opposite / adjacent. This correlates to angle = arctan(0.5/4). In Excel this would be =atan(0.5/4) which yields 0.12435. Unfortunately this returns a value in radians which means nothing on a table saw. We need to multiply this by 180 and divide by pi. In Excel this would be = atan(0.5/4)*180/pi(). This yields 7.125 degrees. Note that changing the height of the bucket will change the angle. If we plug in 4 sides and 7.125 degrees into the jansson.us N-sided box calculator we get a blade tilt of 44.6 degrees. This is difficult to measure but if we set the blade tilt to a notch short of 45 degrees it should work.

The two resulting boxes came out well using cedar. I am using blue painters tape to hold the sides together. The intent of this prototype is to get a basic shape and make sure when we go to more sided boxes we fit within the same space. Our next test will be a six sided box of the same dimensions.

IMG_1304

Amazon Echo – apps I like

Having played with the Amazon Echo a few days, there are a few things that I like and don’t like.

  1. The natural language interpretation is relatively good. I remember years ago trying to use Dragon Naturally Speaking and realizing that I could type better than it could take dictation. I think that the Alexa app can understand what I am saying 90% of the time and act appropriately.
  2. I like the open platform concept where people can submit their own apps and get them released. This is a new technology and innovation and new apps are being added on a regular basis. I like the fact that you can add your own and not have to go through Amazon to get it approved for your use. You also don’t have to buy a developers license to do development. This was my biggest frustration with the Apple iPhone development platform. Initially if I wanted to develop something for me, I had to pay $100 annually and have Apple review it.
  3. Some of the apps that I like
    1. a home grown app that states days till and event. I hacked together an app based on the color example in the Alexa Skills Kit and used Lambda to store the code and the developers console to store the utterances. The app is currently very simple where you start it and it lists days till three dates. You can ask for each individual date by saying keywords like graduation and college and it will list days till classes start and days till graduation.
    2. the LiveStream connection. I listen to NRP every morning to get the news. I like the “daily update” that you can request and get bits of news from different sources. The news read by a newscaster is much better than the computer voice reading the news so the blend of NRP, ESPN, and other news sources mixed in helps. It is a little frustrating that you can’t mix in your own sources and the app gives you a pre-defined list but it works for me right now.
    3. the Jeopardy Skill. This is an interesting app in that it will ask you six questions on a daily basis. I like the brain teasers and this is almost like doing a small crossword puzzle on a daily basis. I could see setting something like this up and helping kids with homework. It looks like the questions could come from DynamoDB or be hard coded into Lamdba. The question and answer appears somewhat natural and I have not stumbled across syntax or phrasing issues with my answers. The natural language seems somewhat flexible and is forgiving enough to interpret your answers.
    4. The Kindle Book Reader. I tried this today to see how well it works. I can see it being something that I would use randomly. If I am doing something with my hands and need a distraction other than music it might work. The computer voice is a little difficult to listen to when compared to an Audible Book but I am a bit cheap and don’t want to pay the big bucks for audio books.
    5. Music. I love the variety of music that can be played. It is nice being able to request Pandora or an artist specifically. I have gotten addicted to Pandora and it is nice that it is integrated into the Echo. Being able to provide feedback with like and dislike also helps train the stations of interest. I have my Echo in the kitchen so it is nice to work on dinner or something special while listening to music.
  4. Some of the things that are a little frustrating are
    1. Having the device tethered to a power cord and wifi network. It would be much nicer if it were portable or an app on my iPhone. I randomly use Siri but the app diversity on the Echo make it more than a query to get answers from the Internet
    2. Speaking of the internet, simple Siri queries work much better than Alexa queries. The integration with Google, Bing, Yahoo, random search engine is not as good as Siri. Yes you can ask things like how many pints in a gallon and it will answer. It typically does good at looking things up on wikipedia but the natural language interface with Siri is so much better. This is one area that I am looking forward to improvement in.
    3. The process to launch an app is cumbersome at best. Some terms get overloaded. For example when I was first trying to load the Jeopardy app I kept getting the song Jeopardy loaded and playing. It took a while to figure out what to say and realize that there was a delay in enabling the app and having it work on the Echo.
    4. The user interface to enable a skill is a little klunky. My first thought was a great add-on to the Echo would be a touch screen that can sit near it. The card interfaces that are displayed to your phone app can be displayed to a wifi-enabled touchscreen. For example, if I ask about the score of a sporting event it would be nice to get the box score and stats of the game displayed on a screen. This is currently done through a card interface to a phone/computer but having it displayed to a Raspberry Pi or BeagleBone touch screen device would be a great add on. I can see something like this being offered and integrated into a car (once the Echo/Alexa app can be made mobile)
    5. The name Alexa. It would be really nice if you could change the device wake word. I use the word Amazon way too much and don’t want to use that word. It would be nice if you could address it as “Hal” or “Computer” as is done in 2001 or Star Trek. I would even settle for “R2D2” or “C3PO” because, hey they were just a mobile Echo on steroids. That is where we are going right?
  5. Things I look forward to
    1. Using the Echo as the base station playing on other bluetooth speakers and not using my iPad/iPhone to play. I would rather use the Echo as a player and the speakers around the house to get sound where I want it
    2. Mobility. Mobility. Mobility
    3. Apps that can integrate with my work calendar or calendar on my phone. My gmail calendar is nice but it is not where I store what I do on a daily basis.
    4. Integration with other devices like my set-top box so that I can set recordings and list things that have been recorded.

Overall I am happy with my experience. My family has not hated it yet and my relatives have enjoyed trying to stump the device with commands.

Amazon Echo date skill (app)

In this tutorial we will develop a simple Alexa skill using the development tools and Lambda services. We want to build a simple application that looks at the current date and says how many days until a target that we define. The configuration is static and self sustained and does not require on any other services.


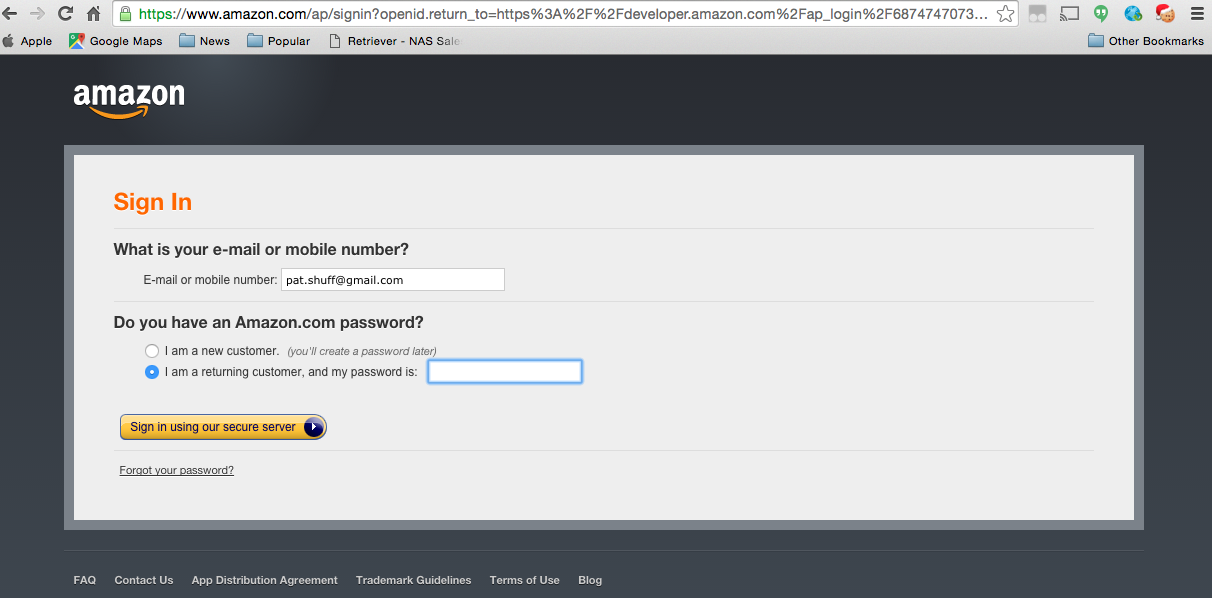
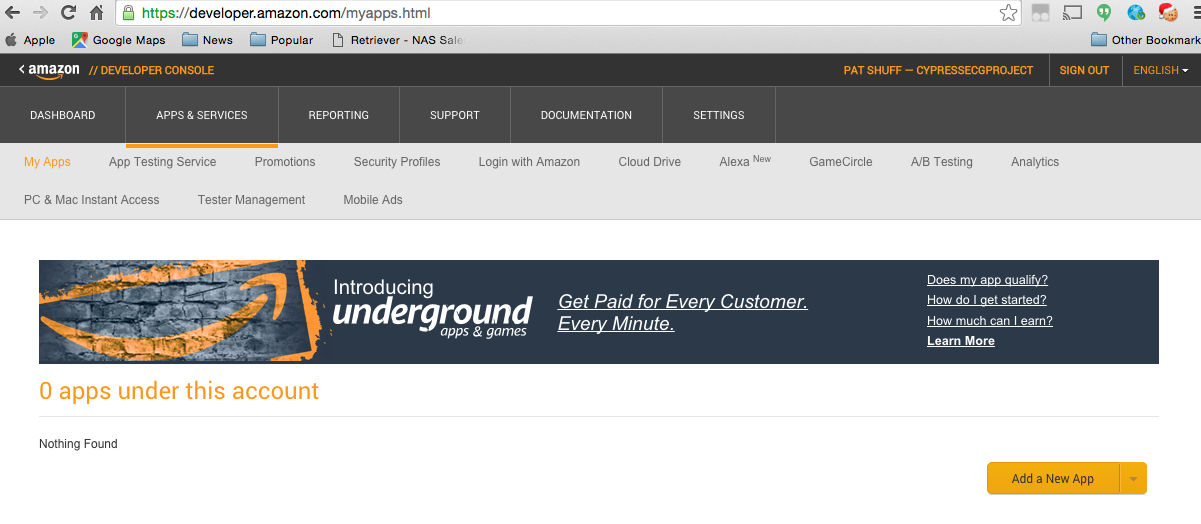
First, we want to log into https://developer.amazon.com

Screen Shot 2016-01-04 at 10.35.12 PM

From here, we click on the Alexa link to get access to the development console.

Screen Shot 2016-01-04 at 10.36.37 PM

Click on the DEVELOPER CONSOLE button at the top right of the screen. This will take you to an authentication screen (assuming that you have signed up for the development tools for your account).

Screen Shot 2016-01-04 at 10.37.37 PM

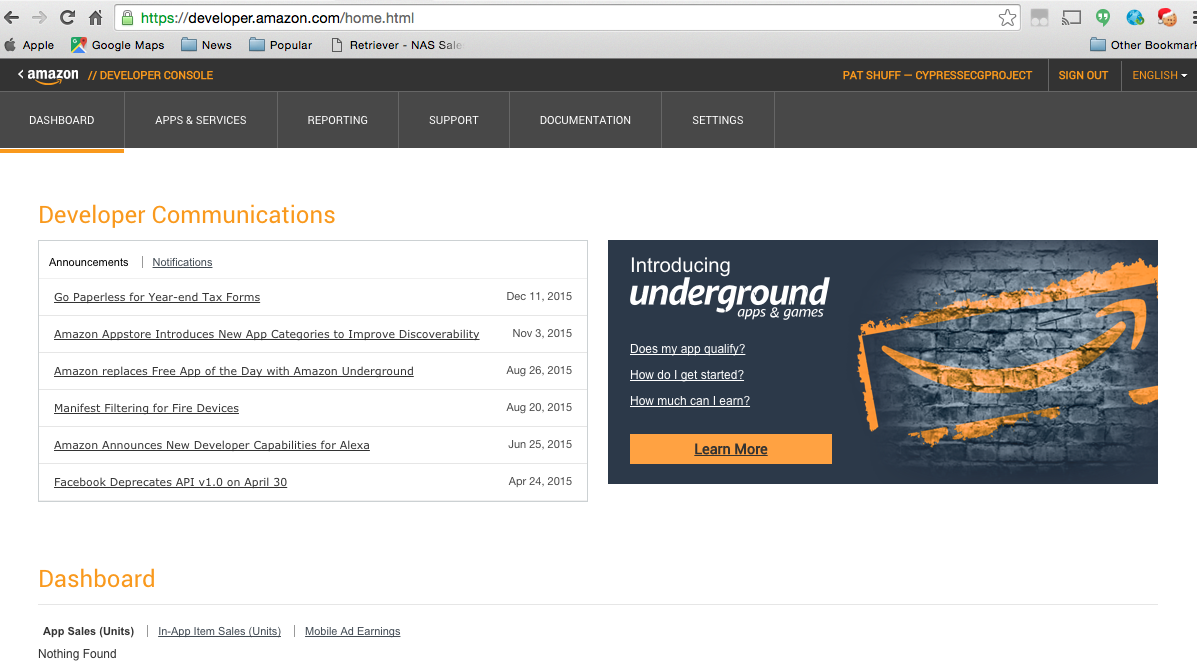
This takes you to the developer console.

Screen Shot 2016-01-04 at 10.39.01 PM

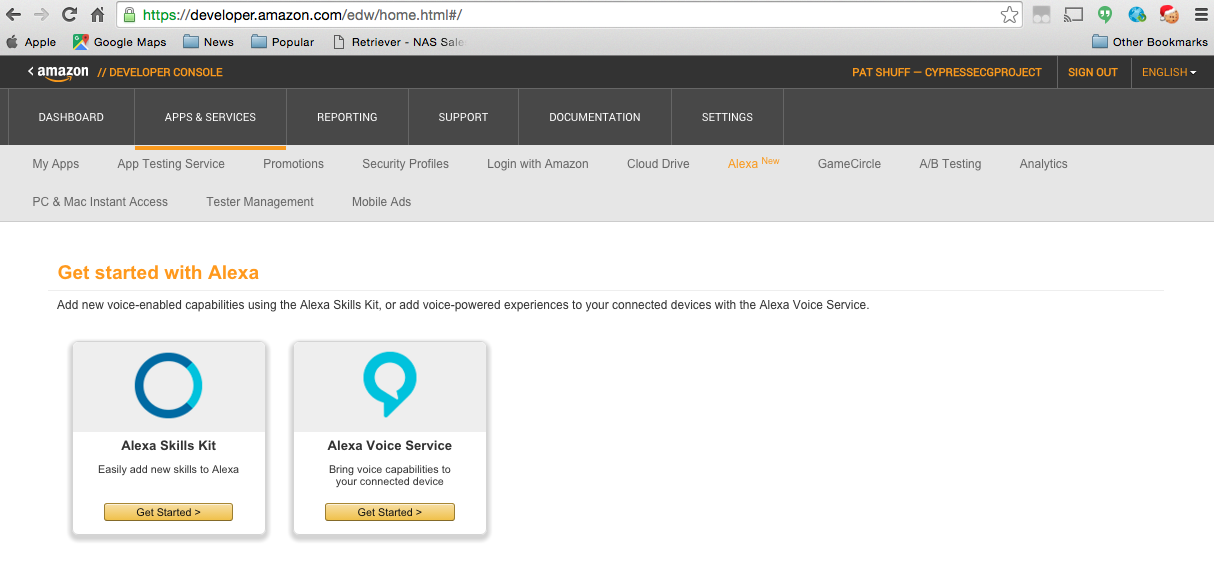
Click on the Apps & Services button at the top left.

Screen Shot 2016-01-04 at 10.40.17 PM

Click on Alexa to get the Alexa development console.

Screen Shot 2016-01-04 at 10.41.18 PM

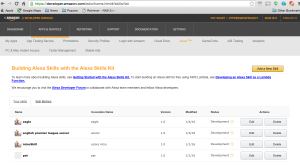
Click on the Alexa Skills Kit to see the skills that you have defined. It is important to note that these skills are available for the account and only the account that you logged in as. When you setup your Amazon Echo you associate an account with the echo. This linkage allows you to test these apps (called skills) on your Echo before releasing to Amazon for wide distribution.


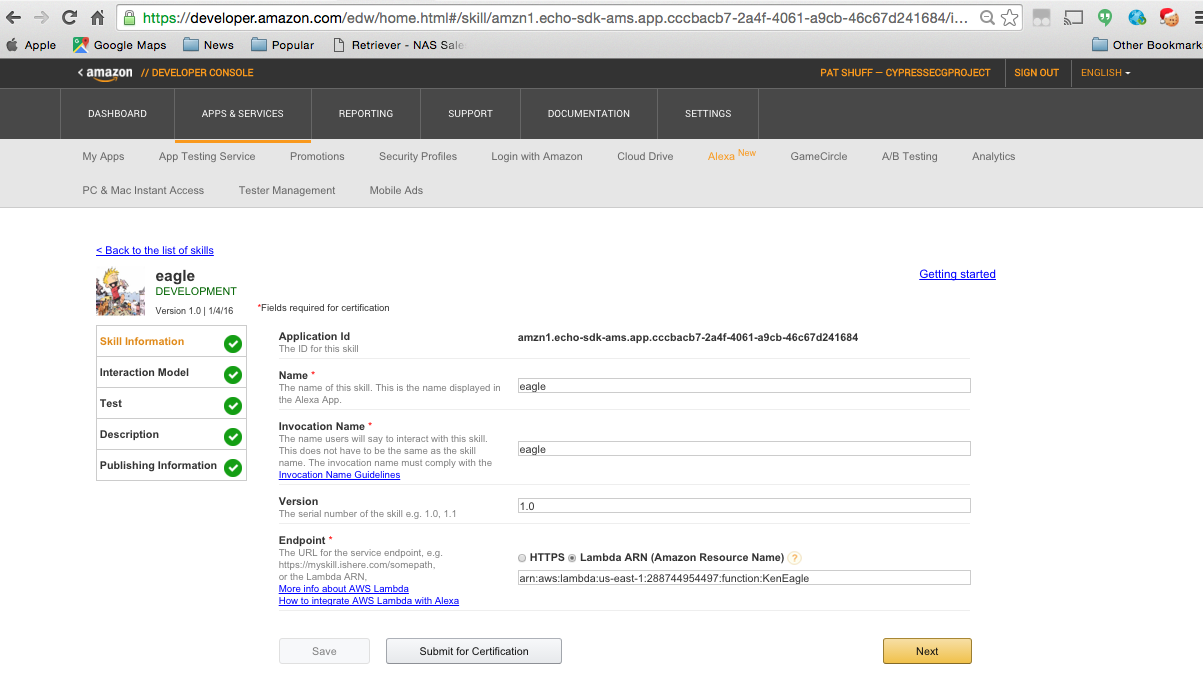
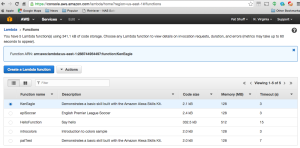
When you click on the Skill Kit you see a list of skills that you have defined. From here you can create new skills and edit old ones. In this example we have four skills that we have developed; eagle,  English premier league soccer,  introSkill, and pat.

Screen Shot 2016-01-04 at 10.43.20 PM

If we click on the edit button to the right of eagle, we can look at how we have defined the eagle skill.


In this example, we name the skill eagle and it is invoked by saying “Alexa, load eagle”.  We also link this service to a Lamda service identified by the Amazon Resource Name arn:aws:lambda:us-east-1:288744954497:function:KenEagle

Screen Shot 2016-01-04 at 10.46.24 PM

The second thing that we need to define is the instances, slots, and utterances for this skill. This is done by clicking on the Interaction Model on the left menu system. Note that we have two things that this skill will report. The first is the number of days until Ken’s 18th birthday which is the last day that he can get his Boy Scout Eagle Ranking. The second is the number of days until he graduates from high school. For both of these the invocation of the skill announces the number of days until both events. If you ask for eagle, it just reports the number of days until his 18th birthday. If you ask for graduation, it just reports the number of days until his graduation ceremony.

Screen Shot 2016-01-04 at 10.48.43 PM

Note that we have two subroutine calls that are made; EagleIntent and GraduationIntent. These are two routines that are defined in the Lamda service.


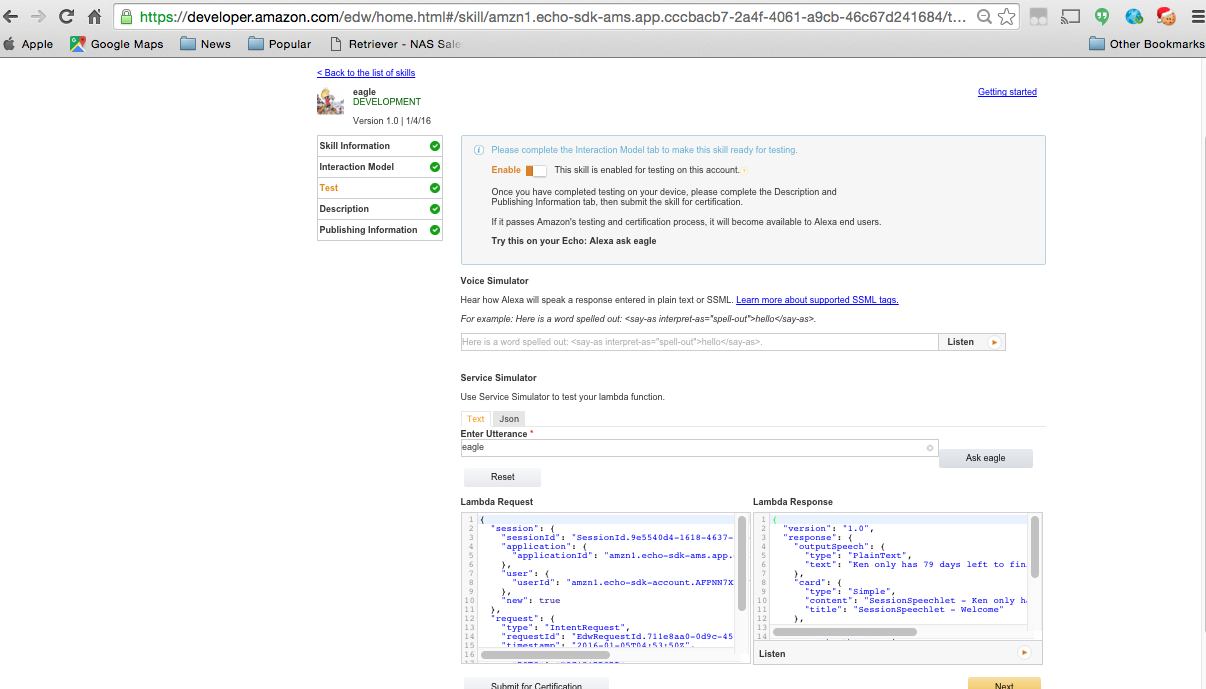
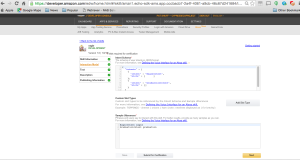
The Test tab allows us to enter the text translation of an utterance and see how the system responds. Note that we get not only what will be said with the outputSpeech but also the card that is displayed in the app that runs on your phone or tablet.  In this example we used the utterance “eagle” to see what it responds with.

Screen Shot 2016-01-04 at 10.54.03 PM

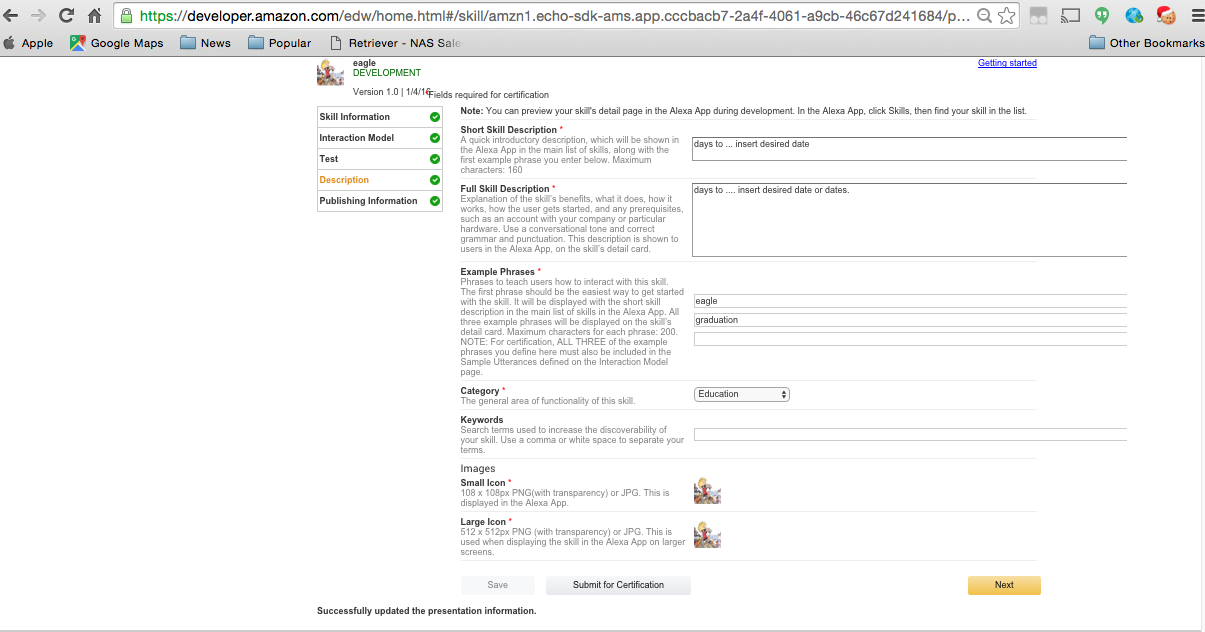
In the Description tab we look at a simple and longer description of the skill that will be used when you publish this service. This information is not critical if you are self publishing and have no intent to share this skill with others.

Screen Shot 2016-01-04 at 10.56.52 PM

We also include a couple of icons for a small and large logo associated with this skill. We can also define more information that Amazon needs to figure out if this skill should be shared with others and how it might work before they certify the skill.

Screen Shot 2016-01-04 at 10.58.53 PM

It is important to note that the last screen is not needed if you have no intentions of publishing your apps and only want to run it locally on your personal Echo.

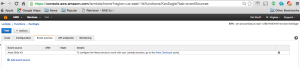
The second part of the code is the Lambda Service. The Lambda Service is managed from the aws console, https://console.aws.amazon.com.

Screen Shot 2016-01-04 at 11.01.10 PM

Click on the Lambda console.

Screen Shot 2016-01-04 at 11.02.42 PM

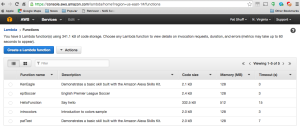
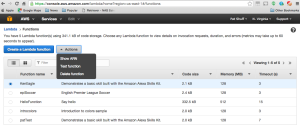
In this console, we see Lambda functions that we have created. We can click on the radio button to the left of the name and perform a variety of actions on the function. One is to look up the ARN which we needed for the Alexa Skill Kit.

Screen Shot 2016-01-04 at 11.04.22 PM

Clicking on the Show ARN gives us the unique identifier that we need.

Screen Shot 2016-01-04 at 11.04.37 PM

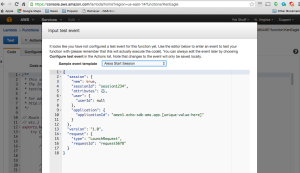
Clicking on the Test Function pull down allows us to select a standard test to run our code if we want to. This is the easiest way to test the initial invocation routine that is run if you launch your skill without any invocations or utterances initially. For example, if I say “Alexa, load eagle” it will run the Alexa Start Session routine which corresponds to the onLaunch() function.

Screen Shot 2016-01-04 at 11.06.02 PM

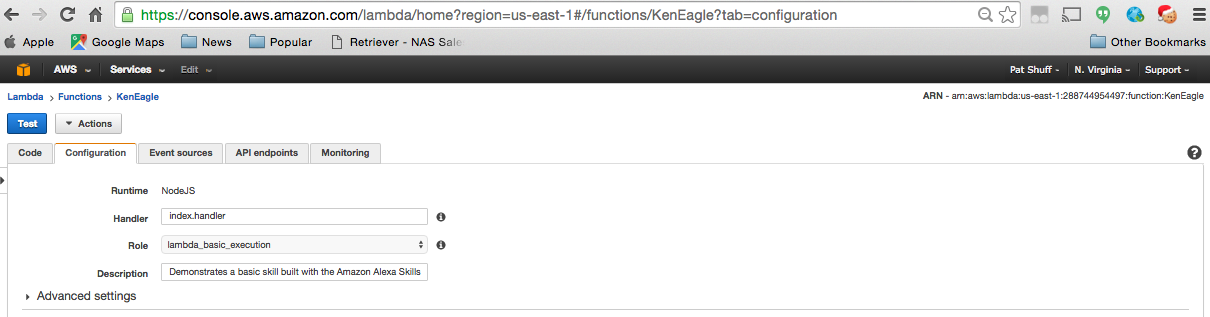
There are five things that you can do with this user interface. The first is edit your code for this skill. We will dive into the code in a bit but the initial screen does show you the inline code that you create.

Screen Shot 2016-01-04 at 11.10.41 PM

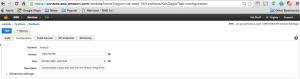
The second option that we have on this screen is the Configuration options. Here we define that the system that we are defining is invoked with index.handler so we need to define a handler in our code. We are also associating a user role to this function allowing it to run as a lambda routine on the Amazon Lambda Services. We select the lambda_basic_execution role.

Screen Shot 2016-01-04 at 11.12.19 PM

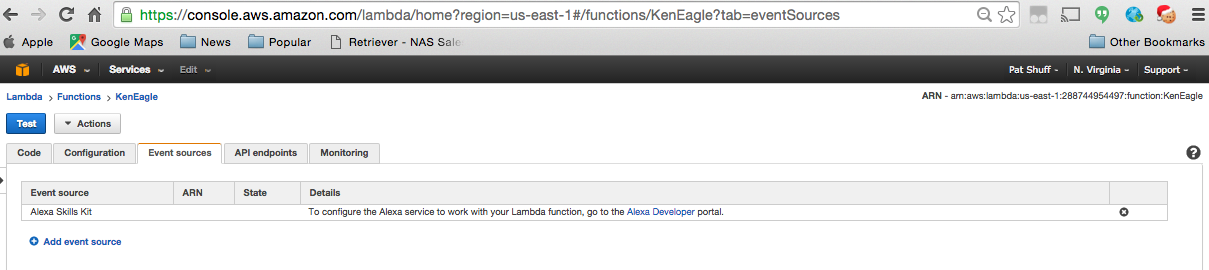
The Event sources associates how the function is called. We Add an event source and select the Alexa Skills Kit to invoke this Lambda function.

Screen Shot 2016-01-04 at 11.14.44 PM

We don’t really use the API endpoints or Monitoring for this application. We get 1,000,000 requests a day for our service. Based on what we are doing (on one device) we should never get that many invocations and are not calling this service from other services.


In the code section, the first thing that we do is define a handler

// Route the incoming request based on type (LaunchRequest, IntentRequest,

// etc.) The JSON body of the request is provided in the event parameter.

exports.handler = function (event, context) {

    try {

        console.log(“event.session.application.applicationId=” + event.session.application.applicationId);

        /**

         * Uncomment this if statement and populate with your skill’s application ID to

         * prevent someone else from configuring a skill that sends requests to this function.

         */

        /*

        if (event.session.application.applicationId !== “amzn1.echo-sdk-ams.app.[unique-value-here]”) {

             context.fail(“Invalid Application ID”);

        }

        */

        if (event.session.new) {

            onSessionStarted({requestId: event.request.requestId}, event.session);

        }

        if (event.request.type === “LaunchRequest”) {

            onLaunch(event.request,

                event.session,

                function callback(sessionAttributes, speechletResponse) {

                    context.succeed(buildResponse(sessionAttributes, speechletResponse));

                });

        } else if (event.request.type === “IntentRequest”) {

            onIntent(event.request,

                event.session,

                function callback(sessionAttributes, speechletResponse) {

                    context.succeed(buildResponse(sessionAttributes, speechletResponse));

                });

        } else if (event.request.type === “SessionEndedRequest”) {

            onSessionEnded(event.request, event.session);

            context.succeed();

        }

    } catch (e) {

        context.fail(“Exception: ” + e);

    }

};

All of this code is auto generated by the sample skill kit development. The important thing to note in this section is that there are three functions; LaunchRequest, IntentRequest, and SessionEndedRequest. The LaunchRequest calls onLaunch which we must define later in the code. The IntentRequest calls onIntent which parses the utterances mappings to intances which we defined earlier. The last section is SessionEndedRequest which calls onSessionEnded. This cleans up any locks or variables that we have created and gets everything ready for the next instance creation.

/**

* Called when the session starts.

*/

function onSessionStarted(sessionStartedRequest, session) {

console.log(“onSessionStarted requestId=” + sessionStartedRequest.requestId +

“, sessionId=” + session.sessionId);

}

The onSessionStarted basically only logs the fact that the skill was called. We don’t really do more than logging when things are created.

/**

* Called when the user launches the skill without specifying what they want.

*/

function onLaunch(launchRequest, session, callback) {

console.log(“onLaunch requestId=” + launchRequest.requestId +

“, sessionId=” + session.sessionId);


// Dispatch to your skill’s launch.

getWelcomeResponse(callback);

}

onLaunch is called if the user launches the skill with no utterances. This then logs the session creation and calls the getWelcomeResponse function. We could include the getWelcomeResponse code in this function or ask for an utterance before doing anything.

/**

* Called when the user specifies an intent for this skill.

*/

function onIntent(intentRequest, session, callback) {

console.log(“onIntent requestId=” + intentRequest.requestId +

“, sessionId=” + session.sessionId);


var intent = intentRequest.intent,

intentName = intentRequest.intent.name;


// Dispatch to your skill’s intent handlers

if (“EagleIntent” === intentName) {

EagleSession(intent, session, callback);

} else if (“GraduationIntent” === intentName) {

GraduationSession(intent, session, callback);

} else if (“AMAZON.HelpIntent” === intentName) {

getWelcomeResponse(callback);

} else {

throw “Invalid intent”;

}

}

The onIntent function basically maps the utterances that we defined in the Alexa Skills Kit and directs the utterance to a subroutine call. Remember that we created two instances and two utterances. “eagle” calls the “EagleIntent” and “graduation” calls the “GraduationIntent”. These are defined in the Interaction Model section and are implemented in this code. We also have a default AMAZON.HelpIntent if you ask for help. If you say anything else you get an error with an exception of “invalid intent”.

/**

* Called when the user ends the session.

* Is not called when the skill returns shouldEndSession=true.

*/

function onSessionEnded(sessionEndedRequest, session) {

console.log(“onSessionEnded requestId=” + sessionEndedRequest.requestId +

“, sessionId=” + session.sessionId);

// Add cleanup logic here

}

The onSEssionEnded does not need to clean up anything so it only logs that the skill exits for debugging purposes.

// ————— Functions that control the skill’s behavior ———————–


function getWelcomeResponse(callback) {

// If we wanted to initialize the session to have some attributes we could add those here.

var sessionAttributes = {};

var cardTitle = “Welcome”;

var today = new Date();

var months = new Array(‘January’, ‘February’, ‘March’, ‘April’, ‘May’, ‘June’, ‘July’, ‘August’, ‘September’, ‘October’, ‘November’, ‘December’)

var month = months[today.getMonth()];

var day = today.getDate();

var target = new Date(2016,02,24,0,0);

var postfix = “th”;

//    var endd = Date.parseExact(end, “2016-03-24”);

var diff = new Date(target – today);

var days = Math.round(diff/1000/60/60/24);

if (day == 1) { postfix = “st”; }

else if (day == 2) { postfix = “nd”; }

else if (day == 3) { postfix = “rd”; }


var graduation = new Date(2016,4,28,0,0);

var diff2 = new Date(graduation – today);

var speechOutput = “Ken only has ” + days + ” days left to finish his Eagle and ” + Math.round(diff2/1000/60/60/24) + ” days until graduation”;

//    var speechOutput = “Ken only has ” + days + ” days left to finish his Eagle”;

// If the user either does not reply to the welcome message or says something that is not

// understood, they will be prompted again with this text.

var repromptText = “Today’s date is ” + month + ” ” + day + postfix;

var shouldEndSession = false;


callback(sessionAttributes,

buildSpeechletResponse(cardTitle, speechOutput, repromptText, shouldEndSession));

}

The getWelcomeResponse function is called from the help intent or onLaunch functions. This is the meat of the application. We define a few things like session attributes that can be passed to other functions and the card information for the app that runs on the phone or tablet complementing the Amazon Echo verbal interface.


The intent of this code is to print out the number of days between today and March 24th and today and May 28th. These two days are selected because the 24th is Ken’s birthday and the 28th is his graduation day.  We first define what today is by calling the Java function Date(). We want to convert this date from the default date format into something that can be spoken. We first define an array of months that translates the numeric months (0..11) to words (January…December). We also pull out the day so that we can say that today is January 4th. The “th” is postfixed either at the 1st, 2nd, 3rd, or Xth for all other numbers.


We also define the target date as March 24th, 2016 with the Date(2016,2,24,0,0) function call. Note that we pass in the year 2016 but pass in 2 for the month. The months start with 0 for January so March is a 2 in this representation. We next pass in 24 for the day of the month. The zeroes represent hours and minutes. Since we only care about days, we zero out these values.


Once we know when our target is as well as today’s date we can take the difference of these two days and round down the difference to days. The actual date format is in milliseconds so we need to convert the delta into days. This is done by dividing by milliseconds (to get seconds), by seconds in a minute (to get minutes), by minutes in an hour (to get hours), and by hours in a day (to get days). The Math.round(diff/1000/60/60/24) performs this function and returns days difference between our target and today.


We also look at our second target, graduation, and calculate the diff2 for days till graduation from today.


The speechOutput definition is what will be said by the Amazon Echo. It is important to note that this should be natural speech and not raw numbers. We could say that “Today’s date is “ + today but this will be confusing to the person listening to the Echo. By converting this to natural language 01-12-2016 translates into January 12th.


The repromptText is what is used if the routine is recalled or you ask Alexa to repeat what was said. It is typically a shorthand for what was initially said. In our example the getWelcomeResponse by default sayd the number of days until Ken’s 18th birthday as well the number of days until his graduation.


The shouldEndSession variable is either true or false if you want to exit the skill after this function is executed. In this example, we do not want to exit after the getWelcomeResponse so we set the variable to false.


The last thing that we do is call buildSpeechletResponse which creates the audio output from the speechOutput and the application output with the cardTitle. If the shouldEndSession is true, the skill exits. If it is false, we wait for an utterance to call an intent.

function EagleSession(intent, session, callback) {

var sessionAttributes = {};

var cardTitle = “Welcome”;

var today = new Date();

var months = new Array(‘January’, ‘February’, ‘March’, ‘April’, ‘May’, ‘June’, ‘July’, ‘August’, ‘September’, ‘October’, ‘November’, ‘December’)

var month = months[today.getMonth()];

var day = today.getDate();

var target = new Date(2016,02,24,0,0);

var postfix = “th”;

//    var endd = Date.parseExact(end, “2016-03-24”);

var diff = new Date(target – today);

var days = Math.round(diff/1000/60/60/24);

if (day == 1) { postfix = “st”; }

else if (day == 2) { postfix = “nd”; }

else if (day == 3) { postfix = “rd”; }


var graduation = new Date(2016,4,28,0,0);

var diff2 = new Date(graduation – today);

var speechOutput = “Ken only has ” + days + ” days left to finish his Eagle”;

//    var speechOutput = “Ken only has ” + days + ” days left to finish his Eagle”;

// If the user either does not reply to the welcome message or says something that is not

// understood, they will be prompted again with this text.

var repromptText = “Today’s date is ” + month + ” ” + day + postfix ;

var shouldEndSession = true;


callback(sessionAttributes,

buildSpeechletResponse(cardTitle, speechOutput, repromptText, shouldEndSession));


}

The EagleSession is the routine called from the EagleIntent. The key difference for this function is what is returned for the speechOutput. In this function we only report the days till his 18th birthday and not his graduation date. Note that we calculate the graduation delta but do not print it out. This was done because we basically copied the previous code and dropped it into this function changing only the speechOutput.

function GraduationSession(intent, session, callback) {

var sessionAttributes = {};

var cardTitle = “Welcome”;

var today = new Date();

var months = new Array(‘January’, ‘February’, ‘March’, ‘April’, ‘May’, ‘June’, ‘July’, ‘August’, ‘September’, ‘October’, ‘November’, ‘December’)

var month = months[today.getMonth()];

var day = today.getDate();

var target = new Date(2016,02,24,0,0);

var postfix = “th”;

//    var endd = Date.parseExact(end, “2016-03-24”);

var diff = new Date(target – today);

var days = Math.round(diff/1000/60/60/24);

if (day == 1) { postfix = “st”; }

else if (day == 2) { postfix = “nd”; }

else if (day == 3) { postfix = “rd”; }


var graduation = new Date(2016,4,28,0,0);

var diff2 = new Date(graduation – today);

var speechOutput = “Ken only has ” + Math.round(diff2/1000/60/60/24) + ” days left till graduation”;

//    var speechOutput = “Ken only has ” + days + ” days left to finish his Eagle”;

// If the user either does not reply to the welcome message or says something that is not

// understood, they will be prompted again with this text.

var repromptText = “Today’s date is ” + month + ” ” + day + postfix ;

var shouldEndSession = true;


callback(sessionAttributes,

buildSpeechletResponse(cardTitle, speechOutput, repromptText, shouldEndSession));


}

The GraduationSession again is the exact same code with the speechOutput changed. Note that we also add shouldEndSession set to true to exit if you ask about graduation. This was randomly done here just to test the feature if called.

function buildSpeechletResponse(title, output, repromptText, shouldEndSession) {

return {

outputSpeech: {

type: “PlainText”,

text: output

},

card: {

type: “Simple”,

title: “SessionSpeechlet – ” + title,

content: “SessionSpeechlet – ” + output

},

reprompt: {

outputSpeech: {

type: “PlainText”,

text: repromptText

}

},

shouldEndSession: shouldEndSession

};

}

The buildSpeechletResponse function builds what Alexa will say upon return from an Intent call. The code is returned as a JSON structure using the output (or speechOutput) defined by the calling routine.


function buildResponse(sessionAttributes, speechletResponse) {

return {

version: “1.0”,

sessionAttributes: sessionAttributes,

response: speechletResponse

};

}

The buildResponse is what is finally returned to the Echo through the Alexa Skill Kit. This is a JSON structure containing all of the data needed to create the card and speak the response through the speakers.


Overall this example is very simple. The only complex part of the code is defining two dates, getting today’s date, and calculating the delta between the two dates and today’s date.  I suggest that if you want to play with this code, add a third Intent. Pick a target date like July 4th and see how many days are between today and July 4th. A simple hint is that that target date should be new Date(2016,6,4,0,0). You might need to create a couple of utterances because some people say “the 4th of July” and others say “July 4th”.  If you want to get really complex, pick something like Valentines Day or Easter as your target and figure out what day that is by making a search call to a web page. If you type in “when is easter 2016” in a Google search, Google returns Sunday, March 27 embedded into a web page.  The challenge in this request is mapping a web page search to a web page answer into a Date() function call for the date returned.  Once you figure out how to translate this natural language query into a computer query you can make a generic query of how many days till….  and a generic Alexa Skill.


quadcopter assembly – part 3

We will continue our journey into building a quadcopter by working on the flight controller circuit.

quadcopter

The flight controller that we will be using is the Acro Naze32 Flight Controller ($31). This controller requires a little assembly prior to using because it comes in parts. The surface mount parts are on the board but the headers need to be soldered to the circuit. Naze32

The board comes with a straight or angled connector. It is confusing which you want to use. If you get the board without the barometer module it is recommended to use the straight connector. If you get the board with the barometer chip then the angled connector is probably best so that you can put a GPS unit in the same space on top of the quadcopter.

In my opinion, the design of the board is counter intuitive and has some design flaws. The kit comes with three connectors that need to be soldered onto the board. The two headers that go through holes on the board are relatively easy even though one of the connectors is millimeters from a surface mount component. What makes no sense to me is the gold connector that you have to side mount pins to. A connection like this typically is easy to mess up and break under vibration. Why put an edge connector here and not put through holes to solder? The pin towards the middle of the board is close to three surface mount components. Overall, I think that the design is somewhat silly. Why ship extra headers at extra cost but skimp on board size and not put through holes for higher reliability? The connector that I am openly ranting about is the connector shown on the far left on the picture below (connected to pins 4,5,6,7, and 8).

flight_controller_2 flight_controller_1

The next step is to lock down all of the screws mounting the arms to the Q450. This is relatively simple and requires a 2.0mm allen wrench.  Once these are locked down we screw the prop mounts onto the motor with a 2.3mm allen wrench. The two photos below show the screws going into the motor then the prop spacer and nut to hold the prop.

motor_prop_holdermotor_with_nut

The next step is to mount the flight controller to the quadcopter assembly. The assembly has an arrow on top pointing to the direction of travel. The circuit board also has an arrow pointing to the direction of travel. We are going to mount the flight controller board on top of the quadcopter using double sided tape (we could use screws and spacers if desired because the holes are on the board and on the quadcopter). If you use screws and spacers you need grommets to reduce vibration. The double sided tape tends to dampen vibration and keep the system from changing during flight. It is CRITICAL that you use enough tape to isolate the electrical components and the board. It is also CRITICAL that the arrows align with each other. This keeps the software and remote controller aligned. Moving the board off axis will cause imbalance in the motor controller and flight controls.

flight_controller_alignment controller_mounting

Once we have the flight controller mounted, we can mount the battery between the two layers. This is done with a velcro strap to allow for quick release. We loop the strap through the two rectangular holes on the bottom board.

battery_1 battery_2

The next step is a little difficult. We need to take the middle wire (red wire) from the 3 pin connector coming off the speed controller and pull it out. We don’t want all four speed controllers providing power to the flight controller. We take the middle pin out from three of our speed controllers and cover them with shrink fit tubing. The reason why we use heat shrink rather than cutting the wire is to have redundant systems to use in the future. We can always take the tubing off and put the cable back into the connector.

connector_2 connector_1

Now that we have three of the connectors modified, we can plug these connectors into the flight controller.

In the class we took a diversion and downloaded the baseflight-configurator using Google Chrome Store. This is done by searching for baseflight-configurator and installing the plug-in. Once the plug-in is installed, launch it and install the USB driver for the computer that you are using. Once this is installed you should be able to connect to the flight controller from a USB to mini-USB connector.

fc_to_laptop

With this we have a connection to the flight controller from our laptop. If you click on the connect with the port configured to be at 115200 speed you should get a green Disconnect button rather than a red Connect button. As you move the quadcopter around you should see the motion mirrored on the laptop.

The first thing that we need to do once we have the baseflight-configurator running, we need to update the firmware and flash it to the controller. We download the firmware from github then flash it to the controller.

From this we go into the configurator and setup things like motor rotation direction, throttle max and mins. Make sure all features are turned off. We then save and it updates the flight controller firmware.

The class instructions starting at page 113 have screen shots of all of these configurations along with explanation of all options and selections.

One side discussion was that a mobius 1080p camera ($82) is a good add on. It allows you to record a flight and does not add much weight to the quadcopter.

Once we have the software operational, we can connect the speed controllers (and thus the motors) to the flight controller. Looking at the configuration diagram for a Quad X configuration we notice that the bottom right motor is channel 1, top right is channel 2, bottom left is channel 3, and the top left is channel 4. This corresponds to the pin block at the front of the flight controller (front being where the arrow is pointing). The numbering starts from the right side with pin 1 and goes to pin 6 at the left. The orange cable is the signal, the red pin (only connected via channel 2) is power, and the brown wires are ground. You can verify this by looking next to pins 6 and see the “-“, “+”, and square wave on the circuit board. In the photo below we have the speed controllers plugged into channels 1, 2, 3, and 4 with channels 5 and 6 unconnected.

fc_motor


The next step is to plug back into the laptop and test the rotation direction of the motors. By going into the motor testing tab we can energize the motors and rotate them at different speeds. This allows us to test the direction of the motor rotation and reverse the red and yellow wires going to the motor to have them rotate in the direction that we want.

The cool thing at this point is that we have a working quadcopter. We have a battery pack that is communicating to the flight controller. The flight controllers are pushing power to the speed controllers thus turning the motors. The only thing that we are missing is the rc controller to control motor speed and flight. We are using the laptop as the rc controller for calibration.

The next step in the class is to get your rc transmitter paired with the on-board receiver. Given that we had a Spektrum transmitter and receiver, it was different from everyone else. For ours we had to follow the directions in the Spektrum manual. Page 10 shows how to bind the receiver with the transmitter. We used the bind plug method (Binding Using the Receiver and Receiver Battery). We plugged the bind plug into the bind section of the receiver and unplugged connector 2 from the flight controller and plugged it into the receiver. We put the transmitter into bind mode and waited for it to sync with the receiver. Once this one done, the transmitter acknowledged the connection and we could power down the receiver.

The receiver has labels on the connectors. Looking from the bottom with the printing on the left, the bottom row is the bind/dat row. The next row is labeled Thro which correlated to channel 1. The Aile (aileron) is channel 2. The ELEV is channel 3. The RUDD is channel 4. The GEAR is channel 5. The AUX1 is channel 6. Once we map these to the receiver, we need to program the transmitter appropriately.

receiver

With the receiver connected, we power on the quadcopter by plugging in the battery (while connected to the laptop) and can calibrate the rc transmitter so that the controls min out at 1000 and max out at 2000. This is done for the four channels that represent thrust (THRO), pitch (elev), roll (aile), and yaw(rudd). By moving the controls on the transmitter we can see the controls change on the computer. The motors should also spin while you are playing with the controls. You should be able to verify the different motors spinning as you adjust the controls.

tx_cali2 tx_cali

At this point we have a transmitter that communicates to the receiver. We have a receiver that is communicating to the flight controller. We also have a flight controller that is energizing the speed controllers and making the motors spin. The only thing that we are missing is a cover to protect our electronics and propellers.

The cover that we are using is a cover printed by the instructor. The cover is ABS so it is easy to modify with drill holes and cut excess edges off. You can then tape or velcro the top to the quadcopter frame. The instructor puts his receiver taped to the top cover. We are going to put our receiver between the two decks with double sided tape attached to the bottom. You can operate without a cover but your electronics are exposed and hitting the ground could get moisture or dirt into your circuit board.

cover2 cover1

We will use a dremel tool to route out parts of the cover to allow it to fit on top of the assembly and fix it to the frame using velcro.

The props are put onto the motor shafts. The rings under the quadcopter are stabilizers for the propellers to keep them from vibrating. The ring goes onto the shaft first followed by the propeller then the metal washer and metal nut. The metal washer is a bridge to protect the plastic propeller and help keep the nut tight on the shaft. Use a wrench to tighten down the nuts before flying every time that you fly. During flight, half the nuts are trying to get tighter and the other half is trying to get looser.

prop1


With this we have flight! Plugging in the battery and powering on the transmitter allows us to fly our new quadcopter!

Now that we are at the end of the class, let’s review the overall cost. The class itself was $345. This cost covered about half of the cost of building a quadcopter. The overall cost to build this system from scratch is just over $700.

The up front costs for this class are:

  • $300 – rc controller
  • $43 – Lectron Pro 11.1 volt Lithium Ion Battery
  • $45 – Prophet Sport Li-Pro 35W Peak Battery Charger
  • $345 – class fee

total cost: $733

Included in the ($345) class you get

  • $4 – clear electrical tape
  • $2 – solder
  • $18 – apc composite 9×4.5 MR (2) and MPR (2) props
  • $6 – XT60 connectors
  • $13 – Diatone Innovations Q450 V3 quadcopter frame
  • $21 – Afro ESC 20A speed controller (4)
  • $3 – zip ties / velcro / double sided tape
  • $13 – non-adhesive shelf liner
  • $220 – Multistar 2213-980 14-pole outrunner motor (4 at $55 each)

total in parts: $300 that comes with the class

optional components are:

  • $20 – prop balancer
  • $8 – lipo battery monitor
  • $60 – watt meter

Overall, this was a very good class. It was good talking about the theory and practical ways of building a quadcopter. The class does not focus on flying but does talk about when, where, and how to fly. You are on your own to learn how to fly and repair the quadcopter as you crash while learning.