Everything technical needs a diversion. This will be a log of building a quadcopter based on a class that I attended this weekend. The class is hosted by the Houston Hackerspace TxRxLabs. It is a two day class that results in a working quadcopter at the end of the class.
“Everything you need to know to start building your own multicopters. This is a hands-on class in which, by the end of the class, you will have built your own RC quadcopter.”
The pre-notes for the class can be found here. The most important thing to bring is a remote control unit similar to what is used for RC cars, boats, and planes. We purchased the Spektrum DX6 ($200-$300) from a local hobby shop in Houston. The majority of the class purchased the Taranis FrSky X9D ($300). The major benefit of the Taranis is that it is a 16-channel system rather than a 6-channel system for about the same price.
The instructor presentation is a good overview of the class.
The class started out with a discussion on where it is appropriate and not appropriate to fly drones. The best place to start flying is to fly on private property, local parks, or a certified flying field. There are places where you should not fly. www.airmap.io is a list of no fly zones. A good rule of thumb is nothing within 5 miles of an airport or over anything government facilities (state and local).
 Also keep in mind where you are flying and what would happen if you loose power. For example, don’t fly over a highway or places with large crowds. The quadcopter has weight and can travel upto 50 plus miles per hour.
www.meetup.com/sotexdug is a local drone flying club. www.rchouston.com is another local flying club but not specific to quadcopters. They rate and list local flying fields.
One important thing to focus on is making sure that your propeller is not too heavy on one side. This will cause stress and instability and excess wear and tear on your motor. A prop balancer is a good investment ($20). Cheaper balancers are also available and can be used by hand ($6). It is important to get something that will work with a 9 inch prop. The props that we are using for this class are APC Composite 9×4.5 MRP props ($9 for two props).
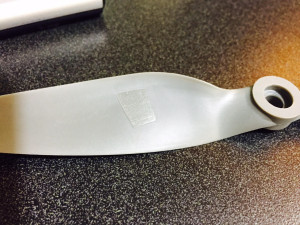
To balance the prop you mount the prop on the balancer and watch which side drops to the floor. You can add weight to the top part of the prop using small clips of clear electrical tape ($4). 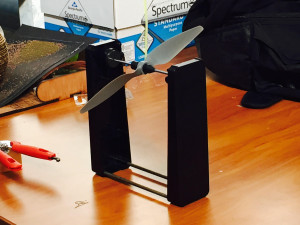
In this example it took 3-4 small pieces of tape to get the prop to remain relatively level. It is important that the tape not get too close to the leading or trailing edge of the prop. The tape should also be placed on the inside edge of the prop and not on the outside edge. The inside edge is the edge where the air flow is at a minimum. This changes based on how you mount the prop on the motor and rotation direction of the prop. The tape is relatively strong and should stick.
The next discussion was around battery life, best practices, and recommendations. Try not to discharge the cell below 3 volts and don’t store them uncharged. Charge them before you put them away for the week. They will loose charge sitting in the bag and if you get below the minimum charge it will not retain as much charge in the future. We purchased the Lectron Pro 11.1 volt Lithium Ion Battery (2200mAh ($69 for three pack) and 3500mAh ($43 for one) batteries). You only need one but we got two so that we could extend the flight time.
A good tool to have is a lipo battery monitor that shows the quality of your battery ($8 for a pair). A good rule of thumb is to store the batteries in a cool location. An ammo can is a good place to store the batteries because bad batteries tend to do bad things (fire, explode, insert what you want here).
You will also need charger that is compatible with the battery that you purchase. We selected the Prophet Sport Li-Pro 35W Peak Li-Po Battery Charger ($30-$45). The charger has a 2S and 3S plug on the front. We will use the 3S connector because the batteries that we purchased are 3 cell batteries.
Servos are something worth looking into. If you are going to mount a camera onto your quadcopter to help with navigation you will need to tilt your camera up when you go faster and level when you slow down. If you don’t tilt your camera it will be pointing into the ground and not in the direction of flight. Most servos operate at 4-6V DC. For a nav camera a small motor with a separate battery might be better. You don’t want to loose your vision or have vision draw too much current from the rotors.
The speed controller is what controls the rotation of the motors. They are driven by a pulse width modulation (PWM) signal from the remote controller. They work on 5V and typically draw 500mA but do generate a significant amount of heat if used over a long period of time.
When selecting a motor it is important to know the prop characteristics, the current draw, the rotational speed at nominal operations. There are a variety of motors that you can select as well as a variety of props. You can look at the wattage and current that is being consumed. A watt meter ($60) is a good tool to have to fine tune the prop and motor relationship. It is not necessary but good to have when designing a quadcopter.
When looking at a prop, it is important to make sure that all props are the same. Don’t mix and match props on the same quadcopter. When looking at a prop it has lettering and numbering on one side, a smaller hole and a bigger hole. The bigger hole faces the motor and the smaller hole with lettering is the outer edge of the prop. The numbers on the prop designate the size and pitch. In our case we have two 9×4.5 MR and two 9×4.5 MRP props. This is a 9 inch prop when measured from tip to tip. The 4.5 is the pitch of the prop. This combination designates the lifting power of the motor-prop combination. The P designation is for pusher and the non P designation is for pulling.
If you are designing your own new system a good rule of thumb is that the quadcopter should hover level at half throttle. Many prop manufacturers have charts that show thrust in grams with rotational speed and amps/wattage for different motor-prop combinations. You can hook up a rig with a kitchen scale to measure force as well as current draw when looking at changing the motor and prop selection.
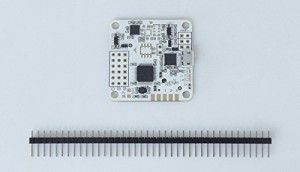
We will be using the Acro Naze32 Flight controller board ($30) for this class. You can get an upgraded board with barometer and compass ($40) integrated to measure elevation and direction. You can hook up a GPS to this system as well to get absolute position and fly waypoints. The PWM channel decoder integrates to the RC Receiver (and transmitter) and translates the controls into PWM outputs that go to the speed controller for the motors. The Naze32 is designed to work with six motors but we will be using four in the class.
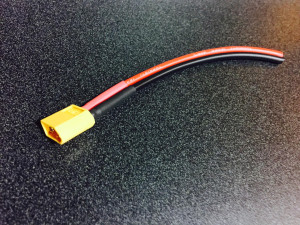
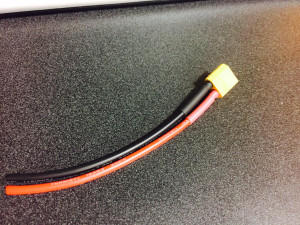
The first step in assembly is to prepare connectors for the batteries. We will be using the XT60 connector ($6 for five pairs) to bridge between the battery and controller. We use heat shrink tubing on the connector to keep from shorting while we are soldering. The resultant female side should look like the photo below.
Make sure that you put the red into the “+” connector and the black into “-” to ensure polarity.
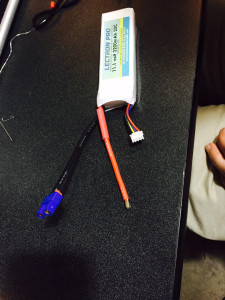
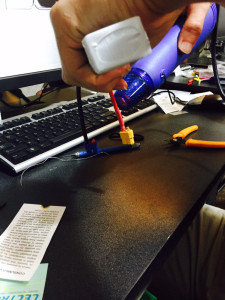
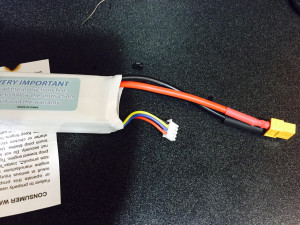
The next step is to cut the old connector from the battery and put the XT60 male connector on the battery. Make sure that you cut one, and only one, side at a time. Cutting both leads will short out the battery and ruin your day as well as the cutters and battery. In the photos below we cut the red wire, soldered the new connector on, and applied the heat shrink tubing. This needs to be done to make sure that the soldering iron does not short out the negative lead while we are attaching the black wire.
At this point we have a battery with the XT60 male connector and a wire with an XT60 female connector.
